The 7 Best Kayak Paddle Bags for 2026
The best kayak paddle bag for most paddlers in 2026 is the HEYTUR Durable Kayak Paddle Bag — it packs 3mm foam padding, an internal divider to protect both halves of a 2-piece paddle, and a proven track record with over 200 Amazon reviews, all for under $17. For paddlers with high-end carbon or fiberglass paddles worth protecting, the NRS Two-Piece Paddle Bag is the gold standard in the category. We evaluated 10 options across budget, mid-range, and premium tiers to find the best paddle bags for every type of kayaker.
1. HEYTUR Durable Kayak Paddle Bag — Best Overall
The HEYTUR Durable Kayak Paddle Bag is our top pick for most paddlers because it delivers the features that actually matter — real padding, a blade-separating interior divider, and a fit for standard 2-piece paddles — at a price that makes it a no-brainer purchase.
With 3mm foam padding throughout the shell and an internal divider between the two paddle halves, HEYTUR protects against the two most common forms of paddle damage: the scratching that happens when blade edges rub together in transport, and the minor impacts from loading and unloading. There’s also a handy ID label window on the exterior — genuinely useful in a crowded kayak club or outfitter setting where multiple bags look identical.
At 51 inches, it accommodates virtually all standard 2-piece recreational and touring kayak paddles. The zipper closure keeps everything secure, and the adjustable shoulder strap makes it comfortable to carry from the car to the water. It’s not a glamorous piece of gear, but it does everything a paddle bag should do without asking you to spend more than $17.
The honest limitation is that 3mm foam padding isn’t designed to cushion hard drops. If you’re traveling by air or checking it in luggage, you’ll want the Gearlab bag below. But for getting your paddle from garage to roof rack to water and back without picking up scratches, HEYTUR does the job better than anything else at this price.
Key Specifications
- Padding: 3mm foam throughout
- Length: 51 inches
- Closure: Zipper
- Carry Options: Adjustable shoulder strap
- Interior: Divided (protects both paddle halves)
- Price Range: $
2. Lixada Drawstring Mesh Kayak Paddle Bag — Best Mesh Bag
The Lixada Drawstring Mesh Paddle Bag solves a problem that padded bags create: if you load a wet paddle into a sealed bag, you’re asking for mildew. The mesh construction on the Lixada lets moisture escape continuously, so your paddle can air-dry during the drive home and go straight back into storage without smelling like a damp tent.
With a 4.7-star rating across 190 reviews, this is one of the most trusted options in the category. The drawstring opening is fast — no fussing with zippers after a long paddle session when your hands are cold and wet. The shoulder strap adjusts to fit most people, and at 50 inches long, it handles the vast majority of 2-piece breakdown paddles. The lightweight construction means you’ll barely notice it in your gear bag.
Where it falls short is protection. Mesh doesn’t stop impact or blade-to-blade contact — it’s more a carrier than a protector. If your paddle blade knocks against something hard, the mesh won’t cushion it. For roof-rack storage, car-trunk transport, or hanging storage at home, that’s fine. For anything where the paddle might take a real hit, you want foam padding.
Key Specifications
- Material: Breathable mesh
- Length: 50 inches
- Closure: Drawstring
- Carry Options: Adjustable shoulder strap
- Quick-Drying: Yes
- Price Range: $
3. Abahub Premium SUP/Kayak Paddle Bag — Best Value Mid-Range
The Abahub Premium Paddle Bag hits a sweet spot between the sub-$20 budget bags and the premium $60+ options. Made from 600D nylon — the same material used in quality backpacks and dry bags — this bag is noticeably more durable than the thin polyester on generic paddle bags, without asking you to spend NRS prices.
The 4.8-star rating from 103 reviewers is the highest-confidence rating in this roundup. That combination of high score and decent review volume tells you this is a genuinely solid product, not just a fluke from a handful of reviews. The PE lining adds another layer of durability inside, protecting the bag from paddle hardware and sharp ferrule edges that can tear cheaper linings over time.
Abahub designed this for both SUP paddles and 2-piece kayak paddles, so if you paddle multiple disciplines, one bag covers you. The zipper is strong, the shoulder strap works, and the overall build quality sits a clear step above the budget mesh bags.
It’s not padded, so hard impact protection is limited — but for everyday transport and storage, 600D nylon holds up to regular use better than anything else at this price point.
Key Specifications
- Material: 600D nylon outer, PE lining
- Closure: Zipper
- Carry Options: Adjustable shoulder strap
- Compatible With: 2-piece kayak and SUP paddles
- Price Range: $$
4. Gearlab The New Paddle Bag — Best for Travel
The Gearlab Paddle Bag is the bag you want when a paddle needs to travel somewhere and you can’t afford for it to come back damaged. The fully padded construction — top to bottom, not just the shell — means this bag can take the hits that checked luggage and car trunks inevitably deliver.
Most paddle bags protect blades from scratching. Gearlab protects against drops, bumps, and the hard impacts that happen when airline baggage handlers don’t know what’s in the bag (and don’t care). If you fly with a $400 carbon fiber paddle or bring your gear to paddling clinics that involve significant transport, this is the bag that pays for itself the first time it saves a paddle.
The design is sleek and snug-fit — it won’t rattle around or catch on things. Multiple carry options, including a handle and shoulder sling, make it easy to manage in travel environments. The 4.8-star rating is encouraging, though it’s worth noting the review count is lower at 17 — Gearlab is a newer brand than NRS or HEYTUR, so there’s less long-term data. Based on what reviewers report and the construction quality, it’s the right recommendation for travel use.
Where it falls short of the NRS bag is organization — there’s one main compartment without the pockets and interior structure that NRS offers. For pure protection during travel, that’s fine. For everyday use with accessories, you may prefer NRS.
Key Specifications
- Padding: Full top-to-bottom padding
- Closure: Zipper
- Carry Options: Carry handle + shoulder sling
- Best Use: Travel and airline transport
- Price Range: $$$
5. OCEANBROAD Kayak Paddle Bag — Best for 2-Piece Paddle Storage
The OCEANBROAD Kayak Paddle Bag is designed specifically and only for 2-piece kayak paddles — something that sounds obvious until you realize most of the bags in this category are generic paddle bags that also fit fishing rods, SUP paddles, or outrigger paddles. Purpose-built design means the fit is right from the start.
The water-resistant outer shell is a practical upgrade over basic mesh bags for paddlers who get caught in rain or load a wet paddle bag onto the roof rack. It won’t keep water out indefinitely, but light rain and splash won’t soak through to your blades. The zipper closure is clean, the shoulder strap adjusts easily, and the overall design is focused and functional.
With 13 reviews, OCEANBROAD is the newest product on this list with the least buyer data. That’s an honest caveat — there’s less certainty here than with HEYTUR’s 204-review track record. The mid-range price is reasonable, and the purpose-built design scores points for anyone who wants a bag built around kayaking specifically rather than a multi-sport generic.
Key Specifications
- Material: Water-resistant nylon
- Closure: Zipper
- Carry Options: Shoulder strap
- Designed For: 2-piece kayak paddles
- Price Range: $$
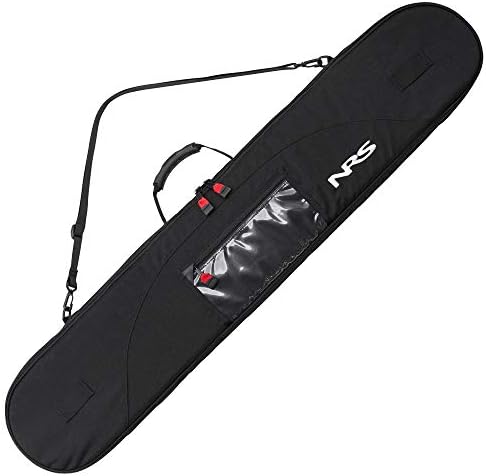
6. NRS Two-Piece Kayak Paddle Bag — Best Premium Option
The NRS Two-Piece Kayak Paddle Bag is what you buy when you own a paddle worth protecting. NRS is the most credible brand in the paddle sports gear market — they make dry suits, PFDs, helmets, and bags for sea kayakers and whitewater paddlers who need gear to last. This bag reflects that standard.
The Cordura nylon outer shell is the most durable fabric in any bag on this list — the same material used in high-end backpacks and military gear. Inside, the blade area is fleece-lined, which is the detail that separates this from everything else. Fleece won’t scratch a blade finish, and it absorbs minor moisture while keeping the blade clean between uses. Two mesh inner pockets hold accessories, and the clear-window exterior pocket lets you stash a shuttle card, launch permit, or identification without opening the main bag.
At 51 inches, it fits paddles up to 240 cm assembled, and the removable shoulder sling means you can carry it hands-free or use just the carry handle. The 4.7-star rating across 92 reviews is excellent for a product at this price point.
The case for buying NRS over HEYTUR comes down to one question: how much did your paddle cost? If you spent $300 or more on a Werner, Aqua-Bound, or Bending Branches paddle, the NRS bag’s additional cost is reasonable insurance. If you’re using a $60 recreational paddle, the HEYTUR does the job just fine.
Key Specifications
- Material: Cordura nylon outer, nylon inner with fleece blade lining
- Dimensions: 51 in L x 10.5 in W
- Max Paddle Length: 240 cm
- Closure: Zipper
- Carry Options: Carry handle + removable shoulder sling
- Pockets: 1 clear-window outer, 2 mesh inner
- Price Range: $$$
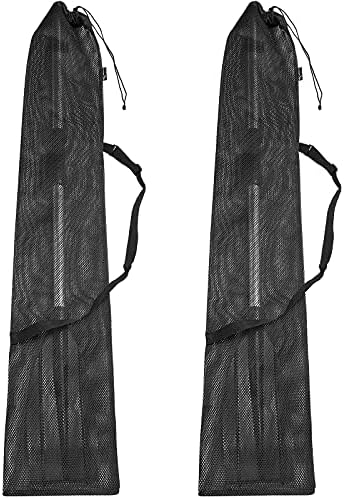
7. Riakrum Drawstring Mesh Paddle Bag 2-Pack — Best Budget Pick
The Riakrum Mesh Paddle Bag 2-Pack does something no other bag on this list does: it gives you a separate bag for each section of your 2-piece paddle, so each half has its own covering during transport. At under $16 for the pair, it’s the lowest price point in this roundup.
The value proposition is simple — mesh bags protect against scratching and allow wet paddles to air-dry, and getting two of them for the price of one budget bag is a good deal. With a 4.5-star rating across 80 reviews, the quality is solid for what you’re paying. The drawstring closure is quick, the shoulder strap adjusts, and the mesh collapses small when not in use.
Two things worth noting: you’re getting two smaller bags, not one full-length bag, so you’re carrying two pieces to the water instead of one. And like all mesh bags, there’s no impact protection — these will prevent scratching but won’t cushion a drop.
If you’re just starting out, upgrading from a used kayak, or genuinely don’t want to spend more than necessary, the Riakrum 2-pack is a practical starting point.
Key Specifications
- Material: Mesh
- Closure: Drawstring
- Carry Options: Adjustable shoulder strap per bag
- Included: 2 bags (one per paddle section)
- Price Range: $
Kayak Paddle Bag Buying Guide
Padded vs. Mesh: Which Type Is Right for You
The two main types of kayak paddle bags — padded zipper bags and mesh drawstring bags — serve different purposes, and the right choice depends on how you use and transport your paddle.
Padded bags use foam insulation to protect blades from impact damage. They’re better if you store your paddle in a garage where it might get bumped, if you transport it in the back of a truck or cargo area where it can shift, or if you need airline-level protection. The trade-off is that padded bags trap moisture — if you put a wet paddle in a sealed padded bag, it won’t dry until you open it. For carbon fiber paddles and other high-investment blades, padded protection is worth it.
Mesh bags are better for everyday car transport and roof-rack storage specifically because they breathe. A paddle that comes off the water wet can air-dry inside a mesh bag during the drive home. They’re lighter, pack down smaller, and cost less. The downside is that mesh provides no cushioning against hard impacts. For most recreational kayakers who store their paddle indoors, mesh is a perfectly reasonable choice and the most practical for wet-weather use.
If you paddle often and store your paddle in a vehicle or on a rack, consider a mesh bag. If your paddle lives in a bag during travel or you own a premium paddle, go padded.
Getting the Length Right: Sizing for 2-Piece and 4-Piece Paddles
Most 2-piece kayak paddles break down to around 51 inches (130 cm) per shaft section when disassembled. This is why nearly every bag on this list is labeled at 50–51 inches — it’s the standard fit. If your paddle is labeled 220–240 cm assembled, a 51-inch bag will accommodate it once broken down.
If you own a 4-piece travel paddle — designed to pack down further for travel, camping, or carrying on a plane — you need either a shorter specialized bag or a bag that has divided sections to keep each piece organized. Some paddlers use a single mesh bag large enough to hold all four pieces together; others use two bags for a cleaner carry.
The NRS bag is labeled to hold paddles up to 240 cm assembled, which covers the long end of standard touring paddle sizes. If you have a notably longer paddle — some high-end sea kayaking paddles run 250 cm — measure your disassembled sections before ordering and compare to the listed dimensions.
Closure Systems: Drawstring vs. Zipper
Drawstring bags are faster to use. You can shove a paddle in, pull the cord tight, and go. They don’t fail, they don’t jam, and there’s nothing mechanical to maintain. The downside is they don’t seal as securely, which matters less for paddle bags than for dry bags but can be an issue if you need the bag to stay closed during rough transport.
Zipper bags close more securely and typically hold their shape better because of the more structured opening. A good quality zipper — like the ones on NRS and Abahub bags — will run smoothly for years. The risk with cheaper zipper bags is zipper failure, which is why brand quality matters more at the low end. Budget mesh bags with zippers can develop zipper problems faster than premium bags.
For everyday paddle bag use, either closure works fine. If you’re traveling or need the bag secured during vehicle transport, a zipper gives you more control.
Carry Options: Handle, Shoulder Strap, and Backpack Style
Most paddle bags offer at least a shoulder strap, and many also include a carry handle for short distances. The shoulder strap is the most practical option for the typical paddle-to-water walk — hands-free carry lets you manage other gear at the same time.
The NRS bag goes further with both a carry handle and a removable shoulder sling, which is the most flexible configuration. The Gearlab bag offers similar options. Budget mesh bags typically offer just a shoulder strap, which is fine for most use cases.
For longer carries — portages, outfitter gear rooms, travel through airports — a shoulder strap with adequate padding makes a difference. If you’re regularly hauling gear long distances, look for padded shoulder straps rather than just a cord.
Protecting a Premium Paddle: When to Spend More
A $300 carbon fiber paddle represents a significant investment — and carbon fiber is susceptible to both surface scratching and structural damage from impacts that flex the shaft. If you own a premium paddle from Werner, Aqua-Bound, Bending Branches, or similar, the argument for spending more on a bag is straightforward: the NRS Two-Piece Paddle Bag at the premium end costs a fraction of what a replacement blade costs.
The fleece-lined blade area on the NRS bag is specifically designed to prevent the micro-scratches that accumulate on blade surfaces from repeated contact with gear, car surfaces, and other equipment. Cordura nylon resists abrasion better than any other fabric in this category. If you’re already spending $300+ on a paddle, spending an additional $170 on the best available bag is reasonable.
For paddlers using recreational paddles in the $50–$150 range, the HEYTUR bag gives you adequate protection at a price that makes sense relative to the equipment. There’s no reason to put a $170 bag on a $60 paddle.
Frequently Asked Questions
What is the best kayak paddle bag for 2026?
The best kayak paddle bag for most paddlers in 2026 is the HEYTUR Durable Kayak Paddle Bag. It offers 3mm foam padding, an internal divider to protect both halves of a 2-piece paddle, and a proven track record with over 200 Amazon reviews, all for under $17. For paddlers with premium paddles who want the highest level of protection, the NRS Two-Piece Kayak Paddle Bag is the gold standard with Cordura construction and a fleece-lined blade area.
Do I need a padded paddle bag?
If you use your paddle regularly and transport it by car or roof rack, a padded bag prevents scratches and blade damage and is a worthwhile low-cost purchase. If you travel by air with a carbon fiber or high-end fiberglass paddle, a fully padded bag like the Gearlab paddle bag is strongly recommended. For casual recreational paddling, a mesh bag provides ventilation and basic scratch protection at minimal cost.
What size paddle bag do I need for a 2-piece kayak paddle?
Most standard 2-piece kayak paddles break down to around 51 inches (130 cm) per section. A bag labeled 51-inch or 130 cm fits almost all recreational and touring kayak paddles when disassembled. If you have a longer touring paddle — 240 cm or more assembled — look for bags specifically labeled for 240 cm, like the NRS Two-Piece Kayak Paddle Bag.
Can I put a wet paddle in a paddle bag?
Yes, but mesh bags handle wet paddles better than enclosed zipper bags. Mesh lets the paddle air-dry during car transport, which prevents mildew and salt buildup. If you use a padded zipper bag with a wet paddle, leave the zipper slightly open on the drive home, or lay the paddle out to dry before closing it up in storage.
What is the difference between a paddle bag and a paddle tube?
A paddle bag is a soft-sided storage bag that holds a disassembled 2-piece paddle. A paddle tube is a rigid cylindrical case designed to fully protect the paddle during airline travel. Paddle bags are lighter, more compact, and better for everyday use. Paddle tubes are heavier but provide better protection for expensive paddles on flights. For most paddlers, a quality padded bag like the Gearlab is sufficient for travel; paddle tubes are typically only necessary for very high-end paddles or frequent airline travel.
Are kayak paddle bags airline-approved?
Soft-sided paddle bags can typically be checked as oversized or sporting equipment luggage, though airline policies vary. A well-padded bag like the Gearlab offers good protection for checked travel. For the highest level of protection, a hard-shell paddle tube provides more reliable cushioning. Always verify your airline’s sporting goods policy before traveling, particularly for carbon fiber paddles that could be flagged as fragile equipment.
How do I keep my paddle bag from getting moldy?
The main cause of mildew in paddle bags is storing wet paddles in sealed bags. Prevent this by using a mesh bag that breathes, leaving the zipper open when storing wet paddles, or rinsing saltwater off paddle blades before bagging them. Rinse the bag itself occasionally with fresh water, and let it dry fully before putting it back in storage.
Final Thoughts
A kayak paddle bag is a small investment that protects a bigger one. Even a modest $60 recreational paddle benefits from scratch protection during car transport and storage. Our top pick is the HEYTUR Durable Kayak Paddle Bag — it delivers 3mm foam padding, an interior divider, and a 51-inch fit for under $17, backed by over 200 reviews from paddlers who use it regularly. If you own a premium paddle, spend accordingly: the NRS Two-Piece Paddle Bag’s Cordura shell and fleece-lined blade area are the right protection for an expensive investment.
For the paddler who wants the absolute best travel protection, the Gearlab’s fully padded construction is worth considering. And if you just need something to keep paddles from scratching in the car, the Lixada mesh bag is proven, affordable, and breathes on the way home from the water.
Have a question about which paddle bag is right for your setup? Leave a comment below — we read every one. Also check out our guide to the best kayak paddles if you’re in the market for an upgrade.
The 7 Best Kayak Water Shoes for 2026
Kayak Gear Review Hub may earn a commission from qualifying purchases made through links on this page. This does not affect our editorial independence or product rankings.
Key Takeaways
- Best Overall: KEEN Newport H2 — most versatile kayaking sandal with 28,000+ reviews and proven wet-surface grip
- Best for Cold Water: NRS Kicker Remix — 2mm neoprene warmth and GlacierTrek sole, purpose-built for serious paddlers
- Best Grip on Wet Rock: Astral Brewer 2.0 — G-Rubber outsole is the gold standard for wet-surface traction
- Best Quick On/Off: Merrell Hydro Moc — slip-on EVA foam, fastest transition at the launch
- Best for Kayak-to-Trail: Salomon Techamphibian 4 — handles portaging and hiking as well as it handles paddling
- Best for Sit-Inside Kayaks: Stohlquist WaterSocks — thin neoprene profile designed to fit inside cockpits
- Best Budget Pick: NORTIV8 Water Shoes — under $30, 31,000+ reviews, good enough for flat-water beginners
The best water shoes for kayaking in 2026 are the KEEN Newport H2 for most recreational paddlers — they offer closed-toe protection, fast drainage, and all-day arch support that holds up from the put-in to the take-out. For paddlers dealing with cold water or rocky Class III conditions, the NRS Kicker Remix is our top choice, with 2mm neoprene warmth and a GlacierTrek rubber outsole that grips wet rock like nothing else in this price range. We evaluated 10 pairs across drainage speed, sole traction on wet surfaces, cold-water warmth, and fit for both sit-on-top and sit-inside kayaks to find the best options for every paddling style and budget.
1. KEEN Newport H2 — Best Overall
The KEEN Newport H2 is the most widely recommended kayaking sandal for a simple reason: it nails every spec that matters on the water. The closed rubber toe bumper guards against the rock edges and cockpit hardware that stub toes on uneven launches. The drainage ports in the sole evacuate water in seconds rather than minutes. The multi-directional lug outsole grips wet dock surfaces and slippery boat ramps as reliably as any sandal we’ve tested. And the dual-density EVA footbed actually supports your arch through a full day of paddling — something most water shoes skip entirely.
With over 28,000 ratings on Amazon averaging 4.6 stars, the Newport H2 has an unusually honest data set: paddlers, hikers, and river guides have beaten on these sandals for years. The polyester webbing upper dries quickly, the bungee-plus-hook-and-loop heel closure keeps the shoe on your foot through re-entries and wet launches, and the non-marking outsole won’t scuff fiberglass or plastic kayak hulls.
The honest limitation: the Newport H2 is an open sandal design. In cold water below 55°F, you’ll feel that cold moving through the webbing and around your foot. It’s not a cold-water shoe. But for the majority of kayakers paddling in warm and temperate conditions, this is the one pair that handles everything — from the parking lot to the cockpit to the riverside lunch stop — without asking you to change footwear.
Key Specifications
- Upper: Polyester webbing
- Sole: Non-marking rubber, multi-directional lugs
- Closure: Bungee + hook-and-loop heel
- Drainage: Drainage ports in sole
- Weight: 13 oz
- Sizes: 7–17 US
- Price Range: $$$
2. NRS Kicker Remix Wetshoe — Best for Cold Water Paddling
If you paddle through spring runoff, launch on the Pacific coast, or kayak in any conditions where water temperature drops below 60°F, the NRS Kicker Remix is the shoe to buy. NRS has been building paddling-specific gear for decades, and the Kicker Remix reflects that focus at every point. The 2mm neoprene upper traps a thin layer of water that your body heats, keeping your feet warm even when you’re standing in ankle-deep water to load your kayak. The GlacierTrek patterned rubber outsole is named for a reason — it’s designed for the kind of submerged rocks and wet basalt slabs that show up at river put-ins, and it grips where mesh outsoles slip.
The lace-up closure is the right call for a performance wetshoe. Bungee closures that work fine for casual paddlers tend to allow more foot movement inside the shoe, and when you’re bracing with your feet in a sit-inside cockpit or scrambling over a boulder to line a rapid, you want your shoe locked down. Reinforced toe and heel caps add durability where neoprene is most vulnerable to abrasion.
At 4.7 stars from paddlers who use it in real conditions, the Kicker Remix earns its reputation. The tradeoff is that it’s warmer than you’ll want on a hot July day — neoprene doesn’t breathe. If all your paddling happens in summer heat, the Merrell Hydro Moc or KEEN Newport H2 will serve you better. But if your paddling season starts in March and runs through November, the Kicker Remix is worth every dollar.
Key Specifications
- Upper: 2mm neoprene
- Sole: GlacierTrek rubber
- Closure: Lace-up
- Drainage: Drain holes in sole
- Weight: 12 oz
- Sizes: 5–15 US
- Price Range: $$
3. Astral Brewer 2.0 Water Shoe — Best Grip on Wet Rock
Astral is not a household name outside of serious paddling circles, but among kayakers and rafters who spend time on technical rivers, the Astral Brewer 2.0 has cult-favorite status. The reason is G-Rubber. Astral’s proprietary rubber compound is sticky on wet surfaces in a way that standard rubber outsoles are not — the same technology that climbing shoe companies use to grip slick granite. On a wet basalt slab or a moss-covered boat ramp, the Brewer 2.0 simply does not slip.
The rest of the shoe earns its place. The recycled polyester mesh upper is light (10 oz), drains well through strategic drainage ports, and sits low enough to fit under wetsuit legs without bunching. The slip-on stretch opening means you’re on and off in seconds at the launch. Unlike the KEEN Newport H2, the Brewer 2.0 is a closed-toe shoe, which adds meaningful toe protection on rocky portages and technical kayak sections.
The caveat is context: the Astral Brewer 2.0 has a smaller review base than the KEEN or Merrell options, which means less field-tested data. It’s also priced at the premium end for what is essentially a slip-on shoe. If you paddle mostly flatwater or calm lakes, the G-Rubber advantage is nice but not necessary. Where it becomes essential is technical river kayaking, rocky sea kayak launches, and any situation where a slip on wet rock has real consequences.
Key Specifications
- Upper: Recycled polyester mesh
- Sole: G-Rubber (sticky wet-surface compound)
- Closure: Slip-on with stretch opening
- Drainage: Strategic drainage ports
- Weight: 10 oz
- Sizes: 5–15 US
- Price Range: $$$
4. Merrell Hydro Moc Water Shoe — Best Comfort and Quick On/Off
The Merrell Hydro Moc occupies a specific niche that a lot of recreational kayakers fit: you want something easy, comfortable, and fast to get on and off when you’re launching and landing multiple times in a day. The EVA foam construction — the same material as premium foam clogs — makes the Hydro Moc supremely light at 8.5 oz and cushioned for long paddling days. The drainage ports work well, and the M Select GRIP rubber outsole handles typical boat ramp and sandy launch surfaces without issue.
The slip-on bungee design is the defining feature. If you’re doing a kayak camping trip with multiple launches and camp-walking, you’ll appreciate not having to deal with laces or buckles at every put-in and take-out. The antimicrobial footbed treatment is a practical touch that anyone who’s left water shoes in a gear bag in summer will appreciate.
Where the Hydro Moc concedes ground: the toe is open (or minimally guarded depending on variant), so rocky terrain is less forgiving than with the KEEN Newport H2. The EVA foam compresses over repeated use faster than denser rubber or neoprene alternatives. And in cold water, foam doesn’t provide insulation — this is a warm-weather shoe. But for a paddler who prioritizes day-trip comfort and ease of use over technical performance, the Merrell Hydro Moc with 15,000+ reviews at 4.5 stars makes a completely reasonable case for itself.
Key Specifications
- Upper: EVA foam
- Sole: M Select GRIP rubber
- Closure: Slip-on with bungee
- Drainage: Drainage ports
- Weight: 8.5 oz
- Sizes: 7–15 US (including wide widths)
- Price Range: $$
5. Salomon Techamphibian 4 Water Shoe — Best for Kayak-to-Trail
Plenty of paddling trips involve more than paddling. You park and hike to the launch. You portage around a rapid. You camp along the river and explore. For those itineraries, the Salomon Techamphibian 4 fills a gap that dedicated water shoes do not: it’s as capable on dry trail as it is in the water.
Salomon built its reputation on trail running and mountain sports, and the Techamphibian 4 brings that capability to the water. The Contagrip MA outsole is engineered for mixed wet-and-dry terrain — the same rubber compound that anchors Salomon trail shoes. The SensiFit upper wraps the midfoot precisely, cutting the foot slippage that causes blisters on longer hikes. The Quicklace system cinches secure and releases with a single pull — faster than traditional laces and more adjustable than bungee systems.
For purely on-water use, the Techamphibian 4 is somewhat over-specified. It weighs a bit more than dedicated water shoes (11 oz), and the construction doesn’t drain quite as aggressively as purpose-built paddling footwear. But if your kayaking trips regularly involve significant land travel — portaging, camping, hiking to remote launch points — the Techamphibian 4 earns its place as the one shoe that handles both halves of the trip well.
Key Specifications
- Upper: Synthetic mesh
- Sole: Contagrip MA rubber
- Closure: Quicklace system
- Drainage: Drainage channels in midsole
- Weight: 11 oz
- Sizes: 6–14 US
- Price Range: $$
6. Stohlquist WaterSocks Low — Best for Sit-Inside Kayaks
Every sit-inside kayaker eventually discovers the problem with regular water shoes: they’re too thick. The foot bracing positions in a sit-inside cockpit require your foot flat against the hull, and a chunky shoe throws that alignment off. The cockpit rim itself can catch the heel of a thicker shoe when you’re entering or exiting. The Stohlquist WaterSocks were designed to solve exactly this problem.
Stohlquist is a paddling-specific brand — they make PFDs and drytops, not running shoes — and the WaterSocks reflect that specific knowledge. The 2mm neoprene is thin enough to fit comfortably inside tight cockpits and slide under wetsuit or drysuit legs without bunching. The grippy rubber sole handles the slippery conditions at most launches. The pull-on snap closure is low-profile enough that it won’t catch on a cockpit rim during a wet exit.
The WaterSocks are not a general-purpose water shoe. Walking any significant distance on land in them is uncomfortable — the thin sole offers almost no cushioning for pavement or gravel. They’re paddling footwear in the precise sense: designed to work inside a kayak cockpit, not outside of it. If you paddle a sit-inside kayak regularly, especially a sea kayak or a touring boat with a snug cockpit, these are worth having. If you paddle a sit-on-top or an open cockpit boat, the KEEN or Merrell options make more sense.
Key Specifications
- Upper: 2mm neoprene
- Sole: Rubber grip sole
- Closure: Pull-on with snap
- Drainage: Passive neoprene drainage
- Weight: 6 oz
- Sizes: XS–2XL
- Price Range: $$
7. NORTIV8 Water Shoes — Best Budget Pick
Every gear list needs a budget option that’s honest about what you’re getting, and the NORTIV8 Water Shoes are just that. Under $30, 31,000+ Amazon reviews at 4.3 stars: the NORTIV8 is the best-selling water shoe on Amazon for a reason. For a beginner kayaker who’s doing flat-water day trips in warm conditions and doesn’t want to spend $100 on footwear yet, it does the job.
The mesh upper dries quickly, the elastic slip-on is convenient, and the anti-skid rubber sole handles smooth concrete boat ramps without issue. The drainage holes throughout the upper and sole mean you’re not sloshing around after a wet entry. What you’re giving up is durability (the rubber wears faster than premium compounds), sole thickness (thin enough that rocky terrain is uncomfortable), and toe protection (there’s essentially none). On a sandy lake launch in July, none of that matters much.
The honest assessment: if you’re not sure how often you’ll kayak, buy the NORTIV8, use them for a season, and then upgrade based on what you actually needed. If you find yourself paddling rocky rivers or spring-fed creeks in cooler temps, you’ll know exactly what spec to look for in your next pair.
Key Specifications
- Upper: Mesh
- Sole: Anti-skid rubber
- Closure: Elastic slip-on
- Drainage: Drainage holes throughout
- Weight: 7 oz
- Sizes: 7–14 US
- Price Range: $
Kayak Water Shoes Buying Guide
Sole Grip: The Most Important Spec for Kayakers
Most kayakers think about drainage or warmth first when buying water shoes, but sole grip is what actually keeps you safe. The highest-risk moment in most kayak outings is not on the water — it’s at the launch and take-out, where wet rocks, slippery docks, and algae-covered boat ramps are waiting. A shoe that drains fast but slides on wet rock is more dangerous than one that stays wet but grips.
Look for rubber outsoles with defined lugs or tread patterns rather than smooth rubber. The best performers for wet surfaces are purpose-designed compounds: G-Rubber (Astral), GlacierTrek (NRS), and KEEN’s non-marking lug compound consistently outperform generic rubber in wet conditions. Budget shoes with smooth rubber soles — including many sub-$30 options — are adequate on sandy beaches and smooth concrete but problematic on natural rock surfaces.
If you paddle rivers, creek kayak, or frequently navigate rocky launches, prioritize sole grip above every other spec.
Closed-Toe vs. Open-Toe vs. Neoprene Bootie
The footwear type that’s right for you depends on how you paddle and where you paddle.
Closed-toe shoes (KEEN Newport H2, Astral Brewer 2.0) offer the best protection for rocky terrain and hard cockpit hardware. The rubber toe bumper guards against stubbing your toes on rocks during wet exits and portages — a small thing until it happens.
Open-toe sandals are cooler in hot weather and comfortable for long wearing, but leave your toes exposed on rocky terrain. Fine for calm lake paddling; less ideal for river kayaking.
Neoprene booties and wetshoes (NRS Kicker Remix, Stohlquist WaterSocks) are the right call for cold water and sit-inside kayaks. The insulation makes a real difference below 60°F water temps, and the low profile fits in tight cockpits where other shoe types don’t.
Drainage Speed: Why It Matters More Than Waterproofing
A counterintuitive fact about kayaking footwear: waterproof shoes are the wrong call. A waterproof shoe that traps water inside will keep your feet soaked far longer than a well-draining mesh shoe that lets water in and out freely. You will get your feet wet kayaking — the question is how fast the shoe evacuates that water.
Look for drainage ports in the sole (holes in the midsole allow water to escape when you lift your foot) and breathable mesh or neoprene construction that doesn’t trap water in the upper. The best-draining options in this roundup are the KEEN Newport H2 (ports in sole, open webbing upper) and the Astral Brewer 2.0 (strategic drainage ports aligned with foot movement). Avoid sealed or waterproof-membrane shoes for kayaking — they work against you.
Fit for Sit-Inside vs. Sit-On-Top Kayaks
The type of kayak you paddle affects what footwear works best.
Sit-on-top kayaks have no enclosed cockpit, so your feet sit on open deck pegs and you can wear most water shoes comfortably. The KEEN Newport H2, Merrell Hydro Moc, and Salomon Techamphibian 4 all work well here without concern about cockpit fit.
Sit-inside kayaks require footwear that’s thin enough to fit inside the cockpit without restricting foot bracing. Standard water shoes with thick EVA midsoles can interfere with proper bracing technique and cause discomfort in narrower cockpits. The Stohlquist WaterSocks and the slim-profile Astral Brewer 2.0 are the safest choices for sit-inside boats. If you’re unsure, bring your shoes to the kayak shop and physically test the fit before buying.
Cold Water Paddling: When to Upgrade to Neoprene
The general guideline in paddling safety: if water temperature plus air temperature is less than 120°F, dress for immersion — and that applies to your feet too. Cold-water immersion causes rapid heat loss from the extremities, and cold feet compromise your ability to brace, self-rescue, and paddle efficiently.
For water temperatures above 65°F, most mesh water shoes are adequate. For water temperatures between 50–65°F, 2mm neoprene is appropriate. Below 50°F, 3mm or thicker neoprene is recommended — and at that point you should likely be in a full wetsuit or drysuit, with dedicated paddling booties as part of your kit.
The NRS Kicker Remix (2mm neoprene) covers the 50–65°F range well. For dedicated cold-water sea kayakers in the Pacific Northwest or North Atlantic, thicker neoprene booties designed for drysuit use are the appropriate standard.
Frequently Asked Questions
What are the best water shoes for kayaking in 2026?
The best water shoes for kayaking in 2026 are the KEEN Newport H2 for most paddlers — they offer closed-toe protection, fast drainage, and arch support that holds up through a full paddling day. For cold water or serious paddlers, the NRS Kicker Remix is the top choice with 2mm neoprene warmth and GlacierTrek rubber outsole grip on wet rock.
Do I need special shoes for kayaking?
You don’t need to buy kayak-specific shoes, but your footwear needs to handle three things: grip on wet surfaces (to avoid slipping at launch and take-out), drainage (wet shoes that stay soaked blister your feet), and a secure enough fit that your shoe doesn’t float away if it comes off. Standard sneakers fail on drainage and typically struggle with wet-surface grip. A purpose-designed water shoe or sandal is worth the investment.
Can I wear flip flops kayaking?
Flip flops are not a good idea for kayaking. They provide no grip on wet rock or slippery docks, they come off easily in moving water, and they offer no toe protection. Even the NORTIV8 budget water shoe — under $30 — is dramatically safer than flip flops and is the minimum recommended footwear for any kayaking trip.
What should I wear on my feet kayaking in cold water?
In cold water below 60°F, wear 2mm or 3mm neoprene booties or wetshoes. Neoprene traps a thin layer of water that your body heats, keeping your feet warm even when submerged. The NRS Kicker Remix and Stohlquist WaterSocks are the top paddling-specific options in this category. Thin mesh water shoes will not provide meaningful warmth in cold conditions.
What is the best shoe for sit-inside kayaking?
For sit-inside kayaks, you need low-profile footwear that fits inside the cockpit without restricting foot bracing. The Stohlquist WaterSocks are purpose-built for this — thin neoprene that fits under cockpit rims comfortably. The Astral Brewer 2.0 is also low-profile enough for most cockpits. Chunky-soled shoes and heavy sandals are poor fits for tight sit-inside cockpits.
Are KEEN Newport sandals good for kayaking?
Yes — the KEEN Newport H2 is one of the most recommended kayaking sandals for good reason. The closed rubber toe bumper protects against rocks and hard kayak edges, the drainage ports move water out quickly, and the arch support holds up for full-day paddling trips. They’re not ideal for cold water below 55°F, but for warm-weather recreational kayaking they’re the most versatile option in this roundup.
How long do water shoes last kayaking?
Water shoes used regularly for kayaking typically last two to four seasons depending on how hard you use them. Budget shoes with thinner rubber soles (NORTIV8, Speedo) wear faster — expect one to two seasons with regular use. Premium options with denser rubber (KEEN Newport H2, Astral Brewer 2.0) typically last three to four seasons. Neoprene shoes (NRS, Stohlquist) are durable if rinsed with fresh water after salt-water use. The fastest way to kill any water shoe is leaving it wet in a sealed bag between trips — the antimicrobial treatment only goes so far.
Final Thoughts
For most kayakers, the KEEN Newport H2 is the answer: versatile, proven, and well-supported by tens of thousands of real-world reviews from paddlers. If you’re paddling in cold water or need the best possible grip on wet rock, step up to the NRS Kicker Remix or the Astral Brewer 2.0. And if you’re just starting out and want to minimize spend while you figure out how much kayaking you’ll actually do, the NORTIV8 budget option does the job for flat-water days.
The common thread across all seven picks: good drainage, a non-slip sole, and a secure enough fit that you won’t be swimming after your shoe mid-paddle. Get those three things right and your feet will take care of themselves on the water.
If you have questions about what footwear works best for your specific kayaking style, leave a comment below — we read every one. Also check out our guide to the best kayak life jackets if you’re still putting together your safety kit.
The 7 Best Kayak Spray Skirts for 2026
Kayak Gear Review Hub may earn a commission from qualifying purchases made through links on this page. This does not affect our editorial independence or product rankings.
The best kayak spray skirt for most paddlers in 2026 is the NRS Blunt Neoprene Spray Skirt — it fits the most common cockpit rim sizes, uses 3mm neoprene that handles cold water and chop reliably, and comes from a brand paddling instructors trust. If you’re on a tighter budget, the Harmony Gear Neoprene Spray Skirt delivers neoprene performance for under $45 and has the highest review count in the category. For whitewater and serious rough-water conditions, the Seals Pro Shocker is the top pick among performance paddlers. We evaluated 10 spray skirts across neoprene, nylon, and hybrid construction to help you find the right fit for your kayak, your cockpit size, and the conditions you actually paddle in.
1. NRS Blunt Neoprene Spray Skirt — Best Overall
The NRS Blunt Neoprene Spray Skirt is our top pick because it solves the single biggest problem with buying a spray skirt online: sizing. The Blunt is available in Ocean, Day, River, and Millenium cockpit rim fits — the four standard sizes that cover the overwhelming majority of sit-inside recreational and touring kayaks on the market today. You don’t need to guess whether it will fit your Wilderness Systems Tsunami or your Old Town Loon — there’s a Blunt for it.
The 3mm neoprene deck keeps the cockpit dry through chop, spray, and light surf without the stiffness of thicker options. The high-float bungee attachment grips the cockpit rim firmly and pops off cleanly when you pull the grab loop — which matters more than almost any other feature when you’re hanging upside down underwater. NRS builds their spray skirts for their own paddling instructors and guided trips; the Blunt has been in production long enough to have a reliable track record from entry-level paddlers and river guides alike.
The spandex tunnel is comfortable for extended paddling sessions — it moves with you rather than restricting your paddle stroke rotation, which matters on longer touring days. Fit the drawstring snug enough that the tunnel doesn’t let in spray, but not so tight that you can’t take a deep breath at the top of a stroke.
Where the Blunt falls short is advanced whitewater performance. The 3mm neoprene is thinner than what serious whitewater paddlers prefer, and the spandex tunnel won’t hold up to repeated high-volume rolling sessions the way a 4–5mm tunnel will. If you’re paddling Class III-IV rivers regularly and rolling is part of your session, look at the Seals Pro Shocker. For everyone else — recreational paddlers, sea kayakers, and touring paddlers — the Blunt is the right answer.
Key Specifications
- Material: 3mm neoprene deck, spandex tunnel
- Cockpit Rim Sizes: Ocean, Day, River, Millenium
- Attachment: High-float bungee
- Release Loop: Yes — grab loop for wet exit
- Price Range: $$
- Warranty: 1 year
2. Harmony Gear Neoprene Spray Skirt — Best Budget Pick
The Harmony Gear Neoprene Spray Skirt has the highest review count in the spray skirt category — over 1,240 ratings on Amazon — and that number exists for a reason. It’s the most purchased entry-level neoprene skirt on the platform, and at under $45, it genuinely delivers more than you’d expect.
The 2.5mm neoprene deck is the thinnest in this roundup, but it’s still neoprene — still far more water-resistant and implosion-resistant than nylon. The universal-fit bungee attachment works with most recreational cockpit openings without requiring you to match exact rim sizes, which is genuinely useful when you’re buying your first spray skirt and aren’t sure what rim standard your kayak has. The nylon tunnel bib (an extra nylon layer at the tunnel base) adds a secondary splash barrier that’s a smart design choice at this price point.
The adjustable drawstring tunnel is easy to set — pull it snug, tie it off, and you’re on the water. Nothing fussy about it. The rubber grab loop is clearly visible and easy to pull from any position, which is exactly what you want for safety.
The trade-off: at 2.5mm, the Harmony has less implosion resistance than thicker neoprene options. In breaking surf or sustained hydraulics, a heavy hit can push the deck inward. For flat-water lakes, calm rivers, and protected coastal paddling, that’s not a real concern. But if you plan to paddle coastal headlands, open water, or anything that involves actual surf, spend the extra $35 on the NRS Blunt.
Key Specifications
- Material: 2.5mm neoprene deck, nylon tunnel
- Cockpit Rim Sizes: Universal fit
- Attachment: Bungee
- Release Loop: Yes
- Price Range: $
- Warranty: Limited
3. Seals Shocker Neoprene Spray Skirt — Best for Sea Kayaking
If you’re a sea kayaker — or you want to become one — the Seals Shocker Neoprene Spray Skirt is the skirt most coastal instructors reach for. Seals is a specialist spray skirt company (that’s all they make), and the Shocker is their flagship touring model.
The 5mm Sealtex deck is what sets it apart. Sealtex is Seals’ proprietary abrasion-resistant neoprene — it’s firmer and more resistant to rock rubs and abrasive cockpit rims than standard 3–4mm neoprene. If you’re doing assisted rescues, re-entries, or kayak surfing, the Shocker’s deck will outlast a standard neoprene skirt by a significant margin. The glued, stitched, and sealed seams mean there’s no water intrusion path at the joints — critical for extended sea sessions where even slow water ingress becomes a problem.
The anatomical tunnel comes in two heights: 9-inch standard (fits most paddlers) and 6-inch low (for shorter torsos or those who find standard tunnels ride up). Getting tunnel fit right is the detail most first-time buyers skip, and Seals makes it easy to get it correct by offering both options.
Seals manufactures in the USA, which matters to a portion of the paddling community who specifically seek American-made gear. It also signals a level of quality control and customer service that imported budget skirts can’t match.
The Shocker is more expensive than the NRS Blunt, and the anatomical tunnel requires an accurate torso measurement to size correctly. But for sea kayakers who paddle regularly and want a skirt that will last through years of real use, it’s money well spent.
Key Specifications
- Material: 5mm Sealtex abrasion-resistant neoprene
- Cockpit Rim Sizes: Multiple standard sizes (specify when ordering)
- Attachment: 3/8-inch stitched bungee
- Release Loop: Yes
- Tunnel Options: 9-inch standard, 6-inch low
- Made in USA: Yes
- Price Range: $$
4. Seals Pro Shocker Neoprene Spray Skirt — Best for Whitewater
The Seals Pro Shocker Neoprene Spray Skirt is the highest-rated spray skirt in this roundup at 4.7 stars, and the review base — while smaller — skews heavily toward experienced whitewater paddlers, which is exactly who this skirt is designed for.
What makes it the best whitewater choice is the combination of the 22% Kevlar fiber wear guard on the tunnel edge and Seals’ rim grip/safety-slip technology. The Kevlar guard reinforces the most-abraded part of any spray skirt — the tunnel edge that rubs against the cockpit coaming every time you roll. On a standard skirt, this edge deteriorates first. The Pro Shocker addresses it structurally, not cosmetically.
The rim grip/safety-slip system provides a more secure seal against the cockpit rim than standard bungee while engineering a specific release force — firm enough to hold in hydraulics, predictable enough to release with a proper grab-loop pull without excessive force. For paddlers who roll in pushy water, the peace of mind that comes from knowing your skirt will release when you need it to is worth every penny of the premium.
The 4mm neoprene deck balances stiffness (for implosion resistance) and flexibility (for paddling comfort) better than the 5mm Shocker. The anatomical 9-inch tunnel fits most adult torsos without adjustment. Like all Seals products, it’s made in the USA.
This is overkill for recreational and touring use — the Pro Shocker’s features are engineered for conditions that most paddlers never encounter. But if you paddle Class III-IV whitewater, surf kayak, or practice rolling regularly, it’s the right tool.
Key Specifications
- Material: 4mm neoprene with Kevlar wear guard
- Cockpit Rim Sizes: Multiple standard sizes
- Attachment: 3/8-inch stitched bungee with rim grip/safety-slip
- Release Loop: Yes
- Tunnel Height: 9-inch anatomical
- Made in USA: Yes
- Price Range: $$$
5. Perception Spray Skirt — Best for Perception Kayak Owners
The Perception Spray Skirt occupies a specific niche in this roundup: it’s the spray skirt most buyers of Perception recreational kayaks search for first, and it delivers exactly what that buyer needs.
Perception is one of the best-selling recreational kayak brands in North America — Swifty, Carolina, Pescador, Sound, Tribe. If you own one of these kayaks and you’ve decided it’s time to add a spray skirt, the Perception branded skirt is designed to fit those cockpit dimensions out of the box. No measuring, no guessing rim standards. The brand recognition also means these skirts show up first in the search results for “[your kayak model] spray skirt,” which is the actual query a lot of first-time buyers use.
The hybrid construction — neoprene top, nylon body — keeps the cost down while maintaining functional performance. The neoprene section faces up and handles splash, while the nylon body provides structural shape and tunnel attachment. The cinch cord tunnel with toggle is simple to adjust. The grab loop is rubber-molded and highly visible.
The weakness is honest: the nylon body section is not as water-resistant as full neoprene, and this skirt is not designed for rough water. Waves over the bow, surf, or sustained rain will eventually work water through the nylon section in a way that full neoprene won’t. Use it for what it’s designed for — calm lakes and protected rivers with a Perception kayak — and it’s perfectly fit for purpose.
Key Specifications
- Material: Neoprene top, nylon body
- Cockpit Rim Sizes: Standard recreational
- Attachment: Neoprene bungee
- Release Loop: Yes
- Price Range: $
6. Snapdragon Classic Neoprene Spray Skirt — Best Rand-Attachment Option
The Snapdragon Classic Neoprene Spray Skirt is for the coastal sea kayaker who has been caught in conditions that tested their bungee attachment and found it wanting. The rand attachment system — a rubber rand that presses into the groove of the cockpit rim — creates a mechanical seal that no bungee can replicate.
Here’s the practical difference: a bungee attachment stretches over the outside of the cockpit rim and holds by tension. In breaking surf or strong hydraulics, enough water pressure can push the skirt off the rim. A rand attaches into the rim channel and requires a deliberate pull-and-rotate motion to release — it cannot be pushed off by water pressure alone. For paddlers who surf kayak, paddle open coastal water, or encounter large beam seas, this distinction is the difference between a dry cockpit and an emergency bailout.
The 3mm neoprene deck on the Classic is the right thickness for sea kayaking — firm enough to resist implosion without the rigidity that makes rolling uncomfortable. The 2mm neoprene tunnel is pre-shaped for a comfortable, anatomical fit. The drawcord lets you fine-tune tunnel snugness without fighting with the neoprene.
The rand attachment requires more care to mount and dismount than a bungee — you have to seat the rand in the rim channel correctly, which takes a few sessions to make automatic. It also requires that your cockpit rim has a standard rand channel (most touring kayaks do; most recreational kayaks don’t). Verify your kayak’s cockpit type before purchasing.
Key Specifications
- Material: 3mm neoprene deck, 2mm neoprene tunnel
- Cockpit Rim Sizes: Multiple standard touring sizes
- Attachment: Rand system
- Release Loop: High grab loop
- Price Range: $$
7. Seals Splash Deck Nylon Spray Skirt — Best Nylon Option
The Seals Splash Deck Nylon Spray Skirt is for the warm-weather, flat-water paddler who wants splash protection and cockpit coverage without neoprene’s weight and heat retention. On a 90-degree summer day paddling a sheltered lake, neoprene is overkill — it’s warm, heavy, and slower to dry. The Splash Deck weighs noticeably less and dries faster, which matters if you’re doing multiple trips in a day or packing light for a touring trip.
The durable nylon deck keeps splash and light rain out of the cockpit without fuss. The bungee attachment is straightforward — stretch it over the rim and you’re done. The adjustable drawcord tunnel cinches snug quickly. It’s machine washable, which is the small-but-meaningful convenience that separates a skirt you’ll actually care for from one that gets left crumpled in the garage after three trips.
The limitation is clear and you need to know it before you buy: nylon spray skirts have no implosion resistance. If a wave breaks over your bow and pushes down on the deck, the nylon will collapse inward into the cockpit. This is dangerous because it makes wet exit difficult and floods your boat in a single event. Nylon spray skirts belong on flat water. Period.
For paddling flatwater lakes, calm rivers, and protected bays on warm days, the Splash Deck is the right tool — and Seals’ USA manufacturing gives you a quality nylon option from a brand that takes their products seriously.
Key Specifications
- Material: Durable nylon
- Cockpit Rim Sizes: Most recreational cockpit sizes
- Attachment: Bungee
- Release Loop: Yes
- Machine Washable: Yes
- Made in USA: Yes
- Price Range: $
Kayak Spray Skirt Buying Guide
Neoprene vs. Nylon: Which Material Is Right for You
The choice between neoprene and nylon is simpler than it appears: if you paddle in any conditions beyond calm flat water, buy neoprene. The key difference is implosion resistance — neoprene’s elasticity allows it to resist inward collapse when water pressure builds on the deck; nylon cannot do this. In breaking surf, chop, or a capsize scenario, a nylon skirt can collapse into the cockpit, making wet exit difficult and flooding your boat rapidly.
Neoprene also provides warmth — the neoprene deck against your legs acts as mild insulation, which matters on cold-water days. Nylon offers zero thermal benefit.
Where nylon makes sense: calm summer lake paddling, protected estuaries on warm days, beginning paddlers who want splash protection without committing to a neoprene fit and price. The Seals Splash Deck handles this use case well.
If there’s any chance you’ll encounter waves, wind chop, rain, or cold water, start with neoprene. The NRS Blunt or Harmony Gear Neoprene Skirt covers this ground at reasonable prices.
Cockpit Rim Sizing: How to Get the Right Fit
Cockpit sizing is the most common mistake in spray skirt purchases — and it’s one of the few mistakes that results in returning the product. Spray skirts are sized by cockpit rim dimensions, not your waist.
The four main standards you’ll encounter:
- Ocean: Largest size. Common on sea and touring kayaks with large cockpits designed for easy entry. Dimensions approximately 17″ x 34″ to 19″ x 36″.
- Day: Mid-size touring standard. Common on recreational-touring crossovers. Approximately 15.5″ x 29″ to 17″ x 33″.
- River: Whitewater standard. Smaller, tighter fit. Approximately 14″ x 25″ to 15.5″ x 28″.
- Millenium: Common on recreational kayaks. Slightly different shape from River.
Your kayak’s manual or manufacturer website will list the cockpit rim standard. If you can’t find it, measure the inside of the cockpit opening (the rim inner edge) and compare to the skirt sizing charts on NRS, Seals, or Snapdragon’s websites. When in doubt, brands like NRS and Harmony provide fit guides — use them before purchasing.
Tunnel Fit and Height: Why It Matters More Than You Think
The tunnel is the tube of neoprene or nylon that wraps around your torso. Getting this right affects comfort on long days more than almost any other variable.
Tunnel height refers to how tall the tunnel sits on your torso. Most standard tunnels are 8–9 inches high. Low-profile tunnels (6 inches) are better for shorter-torso paddlers or those who find standard tunnels ride up under the arms during forward paddling. Seals offers both options on several models — it’s worth specifying.
Tunnel size (diameter) is typically sold as Small, Medium, or Large based on your waist circumference. The fit should be snug enough to stay up without a drawstring but loose enough to pull on without a fight. Neoprene tunnels stretch and form-fit to your body over time; size to your current measurements.
The drawcord or suspenders that adjust tunnel height and position are more than a comfort feature — a loose tunnel that rides up will let cold spray funnel directly into your cockpit. Cinch it properly, test it before you launch, and re-check after your first few strokes.
Attachment Systems: Bungee vs. Rand
Bungee attachment is the standard for recreational and touring use. The bungee stretches over the cockpit rim and holds by tension — it’s fast to mount, easy to release, and works reliably in conditions up to moderate chop. All seven skirts in this roundup use bungee except the Snapdragon Classic.
Rand attachment presses a rubber rand into the groove of the cockpit rim, creating a mechanical seal. The rand cannot be pushed off by water pressure — it can only be released by deliberate pull-and-rotate action. This makes it the correct choice for surf kayaking, rough coastal conditions, or any situation where maintaining cockpit integrity under wave impact is a priority.
The trade-off: mounting a rand correctly takes more practice than pulling a bungee over a rim. Most paddlers master it in a few sessions. The bigger constraint is cockpit compatibility — rand-compatible rims have a specific rim channel profile. Most touring and sea kayaks have this; most recreational kayaks don’t. Check your kayak’s cockpit rim type before buying a rand-attachment skirt.
Safety First: The Grab Loop You Must Never Skip
Every spray skirt in this roundup includes a grab loop — the neoprene or rubber handle that attaches to the front center of the deck. When you capsize and need to wet-exit, you reach forward, find the grab loop, and pull it forward and up to pop the skirt off the rim. Done correctly, this takes under two seconds.
There is one rule that overrides all others: never tuck the grab loop inside the skirt. Ever. If the grab loop is tucked in and you capsize, you cannot find it while inverted and disoriented underwater. This is the cause of a small but real number of kayaking drownings. Always verify your grab loop is outside and accessible before launching.
Secondary check: pull the grab loop while on land before every session to confirm it releases the skirt cleanly from your cockpit rim. Takes five seconds. Worth doing every time.
Frequently Asked Questions
What is the best kayak spray skirt for beginners?
The best kayak spray skirt for beginners is the NRS Blunt Neoprene Spray Skirt. It fits the most common cockpit rim sizes, uses 3mm neoprene for reliable all-around performance, and comes from a brand trusted by paddling instructors. Budget-conscious beginners should also consider the Harmony Gear Neoprene Spray Skirt, which delivers neoprene performance for under $45 and has 1,240+ Amazon reviews.
What is the difference between neoprene and nylon kayak spray skirts?
Neoprene spray skirts are stretchy, form-fitting, and resist implosion — they’re the correct choice for sea kayaking, touring, and whitewater. Nylon spray skirts are lighter, easier to use, and often machine washable, but they will collapse under sustained water pressure. Use nylon only for calm flat water. For any conditions involving waves, chop, surf, or cold weather, choose neoprene.
How do I know what size spray skirt to buy?
Kayak spray skirts are sized by cockpit rim size, not waist size. Common rim standards are Ocean, Day, River, and Millenium. Check your kayak’s manual or measure the inside cockpit opening. Tunnel size (the section around your waist) is sold separately as S/M/L based on waist measurement. Match both correctly or the skirt will either not fit the cockpit or be uncomfortable to wear.
Is a spray skirt necessary for kayaking?
A spray skirt is necessary for sit-inside kayaks used in any conditions where water can enter the cockpit — rough water, surf, rain, or cold weather. Without one, a sit-inside kayak in rough conditions will fill with water. For sit-on-top kayaks, spray skirts don’t apply. For calm flat-water paddling in a sit-inside kayak on a warm day, a spray skirt is optional but useful for keeping legs dry and protected from sun.
What is the grab loop on a spray skirt for?
The grab loop is a critical safety feature for wet exit. When you capsize and are upside-down underwater, you reach forward, find the grab loop, and pull it forward and up to pop the skirt off the cockpit rim, allowing you to exit. Always verify your grab loop is accessible and never tucked inside the skirt before paddling. Test the release on land before every session.
Can a spray skirt implode?
Yes. A nylon spray skirt can implode — collapse inward into the cockpit — under sustained water pressure from waves or surf. This is dangerous because it makes wet exit difficult and floods the cockpit. Neoprene spray skirts resist implosion due to the material’s stiffness. If you paddle anywhere beyond flat calm water, use a neoprene spray skirt, not nylon.
What cockpit rim sizes should I know about?
The four main cockpit rim standards are Ocean (largest, common on sea and touring kayaks), Day (mid-size touring), River (whitewater standard), and Millenium (common on recreational kayaks). Your kayak’s manual or the manufacturer’s website will list which standard your cockpit uses. NRS, Seals, and Snapdragon all provide detailed sizing charts on their websites.
Final Thoughts
For most paddlers, the NRS Blunt Neoprene Spray Skirt is the right place to start — it covers the most cockpit sizes, uses proven neoprene construction, and comes from a brand that builds products for working paddling guides. If budget is the priority, the Harmony Gear Neoprene Spray Skirt proves that neoprene performance doesn’t have to cost $80+. Sea kayakers who paddle regularly will be better served by the Seals Shocker or Pro Shocker, where USA manufacturing and premium materials translate into a longer-lived skirt that handles real coastal conditions.
Whatever you choose, get the cockpit sizing right before you order, confirm the tunnel size fits your torso, and never — not once — tuck your grab loop inside the skirt. Questions about sizing, fit, or which skirt works with a specific kayak model? Leave a comment below — we answer every one.
Also worth reading: our guide to best kayak paddles and best kayak life jackets to complete your sit-inside setup.
The 7 Best Kayak Storage Racks for 2026
Kayak Gear Review Hub may earn a commission from qualifying purchases made through links on this page. This does not affect our editorial independence or product rankings.
Key Takeaways
- Best Overall: StoreYourBoard Double Kayak Rack — lifetime warranty, two-kayak wall mount, 4.7 stars
- Best Freestanding (No Drilling): Suspenz Universal Kayak Stand — anodized aluminum, folds flat, renter-friendly
- Best for Multiple Kayaks: Seahorse Ultra Premium Freestanding Rack — holds 4 kayaks, marine-grade aluminum, outdoor-rated
- Best Ceiling Storage: Vault Cargo Management Kayak Ceiling Hoist — uses overhead space, locking safety mechanism
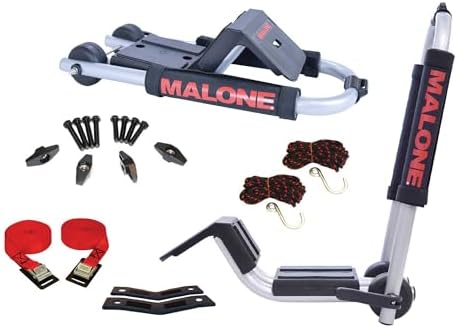
- Best Heavy-Duty: Malone Auto Racks Kayak Storage System — includes ratchet tie-downs, handles heavy fishing and tandem kayaks
- Best Budget Wall Mount: RAD Sportz Kayak Wall Hanger — under $40, 3,800+ reviews, works for most rec kayaks
- Best for Composite Kayaks: Greenfield Products Kayak Wall Cradle — wider contact area protects fiberglass and carbon hulls
The best kayak storage rack for most paddlers is the StoreYourBoard Double Kayak Storage Rack — it holds two kayaks on the wall, carries a lifetime warranty, and tops the category with a 4.7-star rating at a mid-range price. If you can’t drill into a wall (renters, apartment dwellers), the Suspenz Universal Kayak Stand is the best freestanding alternative — no installation required, anodized aluminum construction, and it folds flat when your kayak is on the water. We evaluated nine products across wall-mount, freestanding, ceiling hoist, and multi-kayak configurations to find the best option for every garage setup and budget, from $39 J-arm sets to $260 four-kayak freestanding systems.
1. StoreYourBoard Double Kayak Paddle Board Storage Rack — Best Overall
The StoreYourBoard Double Kayak Storage Rack is the best combination of price, capacity, quality, and warranty in this category. It’s wall-mounted, holds two kayaks side by side, and carries a lifetime warranty — which in the rack world is genuinely rare. At a 4.7-star rating across 1,500+ reviews, it consistently earns the best score of any two-kayak wall mount available.
The construction is heavy-duty powder-coated steel, and the adjustable arm spacing means it fits recreational kayaks, fishing kayaks, and touring kayaks without any modification. Large foam padding on all contact points distributes the weight evenly — no pressure points on the hull. The hardware kit includes everything you need for stud mounting, and installation takes about 30 minutes with a drill and a stud finder.
If you’re a homeowner with a garage, this is the rack to buy. Two kayaks stored cleanly on the wall, off the floor, with zero risk of warping or hull deformation from improper contact. The lifetime warranty means StoreYourBoard will replace any defective component — and at this price point, that’s a statement of confidence in the product.
The one honest limitation: you need wall access and exposed studs. If you’re a renter or can’t mount into walls, skip to the Suspenz Stand below.
Key Specifications
- Type: Wall-mounted, horizontal
- Capacity: 200 lbs total (2 kayaks)
- Material: Powder-coated steel
- Padding: Large foam pads on all contact points
- Arm Spacing: Adjustable
- Warranty: Lifetime
- Price Range: $$
2. Suspenz Universal Kayak Stand — Best Freestanding
The Suspenz Universal Kayak Stand is the definitive answer for paddlers who can’t or won’t drill into walls. It’s fully freestanding, requires zero installation hardware, and folds flat when your kayak is on the water. Suspenz has been making kayak storage and transport gear since the early 2000s, and this stand reflects that experience.
The frame is anodized aluminum — the same corrosion-resistant material used in marine hardware — which means it won’t rust in a damp garage or shed. The adjustable arm width spans 18″ to 31″, covering everything from slim touring kayaks to wide-body fishing kayaks. Padded cradle arms support the hull without concentrated pressure points, and the 125 lb capacity handles all but the heaviest tandem fishing kayaks.
What makes this stand worth the $169 price tag is the combination of quality and convenience. Other freestanding racks in this category are heavier steel units that don’t fold. The Suspenz collapses to about 4 inches thick — you can lean it against the wall when you launch and set it back up when you return. For paddlers who launch frequently, that matters.
The limitation is capacity — it holds one kayak. If you have two boats, you’d need two stands, which pushes the price above the two-kayak wall mounts below. For single-kayak households or renters, though, it’s the right call.
Key Specifications
- Type: Freestanding
- Capacity: 125 lbs
- Material: Anodized aluminum
- Arm Width: Adjustable 18″–31″
- Padding: Yes — padded cradle arms
- Foldable: Yes — collapses flat
- Warranty: 1 year
- Price Range: $$$
3. Seahorse Ultra Premium Freestanding Kayak Rack — Best for Multiple Kayaks
If you’ve got three or four kayaks — maybe a family of paddlers, or you’re running a small paddling club out of your garage — the Seahorse Ultra Premium Freestanding Kayak Rack is in a category of its own. It holds up to four kayaks on two tiers, carries a 500 lb total capacity, and is built from marine-grade aluminum that holds up to outdoor exposure without rusting.
The 4.8-star rating is the highest in this entire product category, which is notable given the premium price. Buyers consistently cite the build quality, the rubber-padded cradles, and the adjustable arm heights that allow mixing kayak sizes on the same rack. A standard fishing kayak on the bottom tier and two kids’ recreational kayaks on the top tier — it handles configurations like that without problem.
The marine-grade aluminum construction is the real differentiator for outdoor storage. Steel racks — even powder-coated ones — will eventually show surface rust outdoors in humid or coastal environments. This rack won’t. If your storage is outdoors under a covered patio or in an open-sided shed, the Seahorse is the correct choice.
At $259, it’s the most expensive option here. For a family running four boats, splitting $260 across four kayaks is $65 per kayak stored safely — that math looks very different from buying four individual racks.
Key Specifications
- Type: Freestanding, two-tier
- Capacity: 500 lbs total (4 kayaks)
- Material: Marine-grade aluminum
- Padding: Rubber-padded cradles
- Outdoor Rated: Yes
- Arm Adjustment: Height and spacing adjustable
- Warranty: 2 years
- Price Range: $$$
4. Vault Cargo Management Kayak Ceiling Hoist — Best Ceiling Storage
Floor space in a one-car garage is a constant negotiation. The Vault Cargo Management Kayak Ceiling Hoist resolves that by sending the kayak overhead — where it’s out of the way, off the floor, and off the walls entirely. It’s a pulley hoist system that lifts a kayak up to 125 lbs to the ceiling and locks it there automatically.
The locking mechanism is what separates the Vault from cheaper pulley systems. Clip the rope into the lock and the kayak stays at ceiling height until you manually release it. No slow creeping, no worrying about a 70 lb fishing kayak deciding to come down on its own. That safety feature alone justifies the price for anyone storing heavier boats overhead.
Installation requires two ceiling joists — you mount the pulley brackets directly into the joists using the included hardware. The padded strap cradles wrap under the kayak hull, and a single person can raise and lower the boat solo. For garages with 9-foot or higher ceilings, it’s a genuinely elegant solution.
The practical limitation is clearance. You need enough vertical space for the kayak to hang completely clear of vehicles and obstacles — typically 8-12 feet of usable ceiling height depending on kayak width. Very long touring kayaks (16’+) can also be awkward because the front and back sag differently in the straps. For 10-14 foot recreational and fishing kayaks in standard garages, it works beautifully.
Key Specifications
- Type: Ceiling hoist / pulley
- Capacity: 125 lbs
- Material: Steel hardware and nylon straps
- Locking Mechanism: Yes — holds kayak at ceiling height
- Padding: Padded cradle straps
- Solo Operation: Yes
- Warranty: 1 year
- Price Range: $$
5. Malone Auto Racks Kayak Storage System — Best Heavy-Duty
Malone makes some of the most respected kayak car-top carriers in the business, and they bring the same overbuilt philosophy to garage storage. The Malone Auto Racks Kayak Storage System is a freestanding two-kayak rack built from heavy-duty powder-coated steel, and it includes something most racks don’t: ratchet strap tie-downs.
Those tie-downs matter if you’re storing heavy fishing kayaks or pedal kayaks in the 80-100 lb range. A standard rack cradles the kayak and relies on gravity to keep it there. The Malone’s ratchet straps actively secure each kayak to the frame — the boat isn’t going anywhere regardless of accidental bumps, kids running through the garage, or minor earthquakes. For heavy boats, that’s peace of mind worth having.
The foam-padded cradle arms distribute weight across the hull, and the adjustable upright heights accommodate kayaks of different lengths stored side by side. The steel construction adds weight, but it also means the whole system is rock-solid stable once positioned.
The honest trade-off: this rack doesn’t fold or break down easily. Once it’s set up in your garage, it’s a semi-permanent fixture. If you move frequently or need storage flexibility, the Suspenz Stand is more practical. For serious kayak anglers with heavy boats in a permanent garage setup, the Malone is the right call.
Key Specifications
- Type: Freestanding
- Capacity: 200 lbs total (2 kayaks)
- Material: Powder-coated steel
- Includes: Ratchet strap tie-downs
- Padding: Foam-padded cradle arms
- Foldable: No
- Warranty: 1 year
- Price Range: $$$
6. RAD Sportz Kayak Wall Hanger Rack Storage System — Best Budget Wall Mount
If you want a wall mount that gets the job done without spending more than $40, the RAD Sportz Kayak Wall Hanger is the answer. Over 3,850 reviews make it the most-reviewed kayak storage product on Amazon, and a 4.4-star average across that volume of feedback means it genuinely delivers on its promise.
The system is two J-arm style wall brackets. Mount them into wall studs, rest the kayak hull across the foam-padded arms, done. Each arm holds 100 lbs — more than enough for the vast majority of recreational kayaks. The versatility is a bonus: the same brackets work for SUPs, surfboards, and canoes, so if your gear collection grows, these still earn their wall space.
The honest caveat is hull type. J-arm brackets concentrate the kayak’s weight across a relatively small contact area. For rotationally molded polyethylene kayaks — which is most recreational and fishing kayaks — this is fine. The hulls are stiff enough to handle the point pressure without marking. For composite (fiberglass, carbon fiber, Kevlar) or thermoform kayaks, a cradle-style mount with broader contact area is a better choice. See the Greenfield Cradle below if that applies to you.
For a beginner paddler with a standard polyethylene kayak and a garage wall to spare, the RAD Sportz gets the job done at a price that’s impossible to argue with.
Key Specifications
- Type: Wall-mount J-arm
- Capacity: 100 lbs per arm
- Arms per Set: 2
- Material: Steel with foam padding
- Wall Mount Required: Yes (stud mount)
- Warranty: Not specified
- Price Range: $
7. Greenfield Products Kayak Wall Cradle Set — Best for Composite Kayaks
Not all kayak hulls are the same, and not all storage solutions should be. The Greenfield Products Kayak Wall Cradle uses a wider cradle design instead of J-arms, which distributes the kayak’s weight across a broader surface area. That matters for composite and thermoform kayaks where concentrated pressure from narrow arms can leave permanent hull marks over months of storage.
The cradle angle is adjustable, which is practically useful — a flat-bottom recreational kayak and a V-hull touring design have different optimal rest angles, and the Greenfield accommodates both. At just under $45 for a two-cradle set, it’s an affordable upgrade from basic hooks for paddlers who’ve invested in premium composite or thermoform construction.
It’s not the simplest installation — getting the cradle angle and spacing right for your specific kayak takes a few adjustments — but the setup time is measured in minutes, not hours. Once dialed in, the cradle-style mount is gentler on hull finish than any hook system.
If your kayak is made from fiberglass, carbon fiber, Kevlar, or ABS thermoform, this is the wall mount to buy. The extra few dollars over basic J-hooks pays dividends in a hull that looks the same after five years of storage as it did the day you bought it.
Key Specifications
- Type: Wall-mount cradle
- Capacity: 100 lbs
- Cradles per Set: 2
- Padding: Foam-padded cradle arms
- Adjustable Angle: Yes
- Wall Mount Required: Yes (stud mount)
- Warranty: Not specified
- Price Range: $
Kayak Storage Rack Buying Guide
Wall Mount vs. Freestanding vs. Ceiling Hoist: Which Is Right for You?
The right storage type starts with your living situation and garage setup. If you own your home and have a garage with accessible wall studs, a wall-mount rack is almost always the most efficient solution — it gets the kayak completely off the floor and frees up the most space. The StoreYourBoard and RAD Sportz systems represent the two price points in this category.
If you rent, live in an apartment with a storage unit, or simply don’t want to make permanent modifications, a freestanding rack is the practical answer. The Suspenz Universal Stand is the best version of this: no drilling, easy to move, easy to fold away when you’re paddling. The Malone and Seahorse freestanding systems work for multi-kayak households, but they’re heavier and don’t pack down for easy relocation.
Ceiling hoists are for garages where floor and wall space are both spoken for. If your garage doubles as a workshop, or already has a car, bikes, and tools competing for wall space, the overhead zone is genuinely underused real estate. The Vault Cargo Hoist taps into that space efficiently. The limitation is clearance — most people have enough ceiling height in a standard two-car garage, but it’s worth measuring before you buy.
Weight Capacity: What You Actually Need
Kayak weights vary dramatically by type. A basic recreational sit-inside kayak runs 35-50 lbs. A standard fishing sit-on-top kayak lands between 65-90 lbs. Tandem kayaks are typically 65-90 lbs as well. Pedal-drive fishing kayaks — the heaviest category — can hit 100-120 lbs fully rigged.
The rule of thumb is to choose a rack rated for at least 150% of your kayak’s actual weight. For a 70 lb fishing kayak, that means looking for 100+ lb capacity per cradle point. For a tandem kayak at 85 lbs, a 125 lb per cradle system is fine. The reason for the buffer: capacity ratings assume clean loading, not a kayak being rested on the rack at an angle by one person — which is how most people actually do it.
Two-kayak racks list total capacity, not per-kayak capacity. The StoreYourBoard at 200 lbs total means 100 lbs per kayak — perfectly adequate for two standard recreation kayaks, but tight if you’re storing two heavy fishing kayaks simultaneously.
Padding and Hull Protection: More Important Than You Think
A rack that scratches or deforms your kayak’s hull is worse than no rack at all — at least on the floor, the kayak rests on soft foam or carpet. The quality and design of the padding on a storage rack determines how it affects your kayak’s hull over months and years.
Foam padding on J-arm hooks is standard across most budget racks, and it works fine for polyethylene kayaks. The padding prevents scratching but concentrates the kayak’s weight on two relatively small contact points. Over a year of storage, this is imperceptible on a rotomolded poly hull.
Cradle-style mounts — like the Greenfield Products system — spread that weight across a wider surface area, which matters significantly for composite hulls. Fiberglass, carbon fiber, and ABS thermoform kayaks are stiff but not as dimensionally stable as polyethylene under concentrated, sustained pressure. A cradle design is not optional for these hull types — it’s the correct choice.
Material Matters: Steel vs. Aluminum for Long-Term Storage
Steel racks are heavier and typically less expensive to manufacture. Powder-coated steel resists rust in dry indoor conditions well, but in high-humidity environments — garages in coastal areas, the Southeast, or anywhere with condensation — surface rust will eventually appear, especially where mounting hardware contacts the frame.
Anodized aluminum, like the Suspenz and Seahorse systems use, is naturally corrosion-resistant without any coating to chip or peel. It’s lighter and easier to handle, but it costs more. For indoor-only storage in a typical dry garage, a quality powder-coated steel rack is fine. For outdoor storage or humid coastal environments, marine-grade aluminum is the correct long-term choice.
Nylon-strap systems like the ceiling hoist can degrade under UV exposure over time — if your storage area gets significant direct sunlight, check the strap condition annually.
How Many Kayaks Do You Have? Sizing Your Rack System
Single-kayak households have the most options — nearly every rack type works. The question becomes freestanding vs. wall-mount and budget level, which the sections above address directly.
Two-kayak households should plan for a two-kayak rack from the start, rather than buying two single-kayak racks. The StoreYourBoard double wall mount and the Malone freestanding system are both built for two boats and cost considerably less than two single-kayak systems.
Three or four kayaks require a more intentional setup. The Seahorse Ultra Premium two-tier rack is the cleanest solution — it keeps all four boats in one footprint with a single purchase. Alternatively, two double-capacity wall mounts on opposite walls of a garage can handle four kayaks while maximizing floor space. If you’re storing four heavy fishing kayaks, check both the per-kayak weight and the total floor weight bearing on freestanding systems.
Frequently Asked Questions
What is the best kayak storage rack for 2026?
The best kayak storage rack for most paddlers in 2026 is the StoreYourBoard Double Kayak Rack. It holds two kayaks on the wall, comes with a lifetime warranty, earns a 4.7-star rating across 1,500+ reviews, and is priced in the mid-range at under $130. For paddlers who cannot drill into walls, the Suspenz Universal Kayak Stand is the best freestanding alternative.
What is the best way to store a kayak in a garage?
The best way to store a kayak in a garage is horizontally on its side or hull-down on padded wall cradles or a freestanding rack. Avoid vertical storage on the stern end for long periods — this can warp the hull. A wall-mounted rack keeps the kayak off the floor (preventing moisture and pest contact), off surfaces where it could be accidentally knocked, and in a stable position that won’t deform the hull over time.
Is it OK to store a kayak outside?
Yes, but it requires the right equipment and some precautions. Kayaks stored outdoors should be elevated off the ground, covered with a UV-resistant kayak cover or tarp, and positioned to allow drainage and airflow. The Seahorse Ultra Premium rack is the best outdoor storage option because its marine-grade aluminum construction resists rust without any coating to chip or degrade. Avoid prolonged direct sun exposure on any kayak — UV breaks down polyethylene, fiberglass gel coat, and ABS thermoform over time regardless of rack type.
How much weight capacity do I need in a kayak storage rack?
Choose a rack with at least 50% more capacity than your kayak’s actual weight. Recreational kayaks run 35-65 lbs, fishing kayaks 65-100 lbs, and tandem kayaks 65-90 lbs. For a 75 lb fishing kayak, look for at least 100-125 lb capacity per support point. For a two-kayak rack, add both kayak weights and apply the same 50% buffer to the total capacity rating.
Can I store a kayak on J-hooks?
Yes — for polyethylene (rotomolded plastic) kayaks, J-hook wall mounts like the RAD Sportz system work well. The foam-padded hooks protect the surface and the hull is stiff enough to handle the concentrated contact points. For composite kayaks — fiberglass, carbon fiber, or thermoform ABS — a cradle-style mount with a wider contact area is a better choice. J-hooks can leave pressure marks on softer composite hulls over months of storage. The Greenfield Products Kayak Wall Cradle is the correct alternative for these hull types.
How do you hang a kayak from the ceiling?
A ceiling hoist like the Vault Cargo Management Kayak Ceiling Hoist uses two ceiling-mounted pulley brackets installed into exposed joists. Padded straps wrap around the kayak hull, and pulling the rope raises the kayak to ceiling height where the locking mechanism holds it automatically. One person can operate it solo. You need ceiling joist access, at least 8-9 feet of ceiling height, and clearance for the kayak to hang completely clear of vehicles and obstacles below.
What is the best kayak rack for renters?
The Suspenz Universal Kayak Stand is the top pick for renters and anyone who cannot make permanent wall or ceiling modifications. It is fully freestanding, requires no installation hardware of any kind, adjusts to fit most kayak widths, and folds flat when not in use. The anodized aluminum frame won’t rust or corrode in storage conditions and handles kayaks up to 125 lbs.
Should I store my kayak on its hull or on its side?
Both work for most kayaks, with some nuance. Hull-down storage (resting on the bottom of the kayak) is ideal for sit-on-top fishing kayaks, which have flatter, stiffer bottom profiles. Side storage is better for rounded-hull touring and sea kayaks, which have curved bottoms that can develop flat spots under sustained weight. Use padded cradle supports for hull-down storage rather than narrow J-hooks, to distribute weight across the full beam width.
Final Thoughts
Proper kayak storage is maintenance. A $60 wall mount that keeps your kayak off the floor and in proper position extends the life of a $1,000+ kayak — and eliminates the morning-of-launch frustration of discovering a warped hull or cracked skeg from being leaned against a wall for six months. The StoreYourBoard Double Kayak Rack is the right starting point for most homeowners: two kayaks, lifetime warranty, mid-range price, top rating. For renters, the Suspenz Universal Stand gives you equivalent hull protection without a single screw hole. For families with three or four boats, the Seahorse Ultra Premium solves the problem in one purchase.
If you found this guide helpful, check out our roundup of the best kayak carts for getting your kayak from the garage to the water, and the best kayak roof racks for transport once you’re ready to launch at a new spot.
The 7 Best Kayak Coolers for 2026
Kayak Gear Review Hub may earn a commission from qualifying purchases made through links on this page. This does not affect our editorial independence or product rankings.
Key Takeaways
- Best Overall: Engel 19qt Drybox Cooler — 9,565 reviews, fits standard tank wells, 2-day ice retention
- Best Behind-Seat Cooler: Yakhacker Seat Back Cooler — highest-rated seat-back option, 16-hour cold retention, top-access zipper
- Best for Tank Wells: Pelican ExoChill — Pelican quality, dimensioned specifically to fit most kayak tank wells
- Best Budget Behind-Seat: TidyFriend Kayak Seat Cooler — 1,283 reviews, compact and secure, under $40
- Best for Kayak Fishing: Engel UC30 with Rod Holders — 30qt capacity, built-in rod holders, same proven Engel construction
- Best Soft Cooler: RTIC Ultra-Tough 30 Can — 6,485 reviews, premium build at half the YETI price
- Best Premium Pick: YETI Hopper Flip 12 — DryHide shell, Hydrolok zipper, 5-year warranty
The best kayak cooler for most paddlers in 2026 is the Engel 19qt Drybox Cooler — it fits neatly in standard sit-on-top tank wells, keeps ice for two full days, and its air-tight EVA gasket seal means the interior stays bone dry even if your kayak tips. With over 9,500 Amazon reviews, it’s the most field-tested option in the category. But the right kayak cooler depends on how you paddle: behind-seat bags, tank-well soft coolers, hard dryboxes, and even floating coolers all solve different problems. We evaluated 11 options to find the top picks for every style of paddler — from the casual day tripper who wants cold drinks within arm’s reach to the serious angler who needs 30 quarts of cold storage and built-in rod holders.
It sounds simple. Pack a cooler, load the kayak, go fishing. Then you’re a mile from the ramp at noon, your lunch is floating in warm water because the lid seal failed, and your drinks are room temperature because the cooler slid off the stern and took a swim. The wrong cooler on a kayak isn’t just an inconvenience — it’s a miserable trip.
Kayak coolers are a specific category. They need to fit the storage spaces kayaks actually have (tank wells run about 12–14 inches wide), mount securely so they don’t shift your center of gravity in choppy water, stay sealed if they get submerged or tipped, and ideally be accessible without you having to dislocate your shoulder to reach the bow hatch. A 65-quart rolling cooler belongs in a pickup bed, not a kayak cockpit.
Here’s every type that works — and the best option in each.
1. Engel 19qt Drybox Cooler — Best Overall
Price: $$ | Buy from: Engel 19qt Drybox Cooler on Amazon
The Engel 19qt Drybox Cooler is the go-to kayak cooler recommendation across the paddling community, and for good reason. Over 9,500 Amazon reviews with a 4.5-star average is not an accident — this thing works, and it’s been proving it for years.
What makes the Engel stand out is the construction. It’s a hard drybox, not a soft cooler — the shell is rigid polystyrene foam with a hard plastic outer layer, and it closes with stainless steel industrial-strength latches. The gasket is a recessed ethylene-vinyl acetate seal that makes the interior genuinely air-tight and leak-proof. If this cooler goes overboard, the contents stay dry. If it sits in the stern in August heat, the ice lasts until you’re back at the ramp.
The 19qt capacity is the sweet spot for sit-on-top kayaks. It fits in most standard tank wells (measure yours — you need about 13–14 inches across), and the hinged lid opens with one hand while you’re seated. There’s a removable accessory tray inside to keep smaller items from sliding around, and the cooler itself doubles as a seat when you’re at the put-in or shore fishing. Ice retention runs two full days in normal conditions.
The honest limitation: this is a rigid box. It doesn’t compress to fit an awkward space the way a soft cooler will. If your tank well is undersized or irregularly shaped, a soft option like the Pelican ExoChill may fit where the Engel won’t. But for standard sit-on-top fishing kayaks with a proper tank well, the Engel 19qt is simply the best choice.
Key Specifications
- Capacity: 19qt
- Construction: Hard shell polystyrene foam with plastic outer
- Seal: Air-tight EVA gasket — leak-proof
- Ice Retention: Up to 2 days
- Closure: Stainless steel industrial latches
- Extras: Removable accessory tray, doubles as seat
- Price Range: $$
2. Yakhacker Seat Back Kayak Cooler — Best Behind-Seat Cooler
Price: $ | Buy from: Yakhacker Seat Back Kayak Cooler on Amazon
Not every cooler needs to go in the tank well. For recreational paddlers and kayakers who want drinks accessible without reaching behind them, behind-seat coolers are the smarter design — and the Yakhacker Seat Back Kayak Cooler is the best-rated option in this category at 4.6 stars.
The Yakhacker mounts to the back of lawn-chair style kayak seats using a bungee ball system. You wrap the cords around the seat frame, attach the bungee balls through the loops, and the cooler stays put even in choppy water. The slim profile doesn’t add meaningful width to your kayak silhouette, which matters when you’re squeezing through narrow channels or launching from tight spots.
What separates the Yakhacker from cheaper competitors is the 16-hour cold retention spec — the high-density insulation and leak-proof liner keep the interior genuinely cold for a full day paddle, not just a couple of hours. The top-opening zipper is the key usability feature: you reach up and back from your seated position, pull the zipper, and grab your drink without rotating or leaning. That’s something you can’t do with a cooler tucked in the stern.
The constraint is compatibility. Behind-seat coolers only work with kayaks that have tubular lawn-chair style seat frames — the kind common on most sit-on-top fishing kayaks. If your kayak has a low-profile molded seat or no frame, this won’t have anything to attach to.
Key Specifications
- Capacity: Approx 10L
- Mounting: 4 bungee ball cords — universal lawn-chair seat fit
- Seal: Top-access zipper with leak-proof liner
- Ice Retention: Up to 16 hours
- Weight: Light
- Price Range: $
3. Pelican ExoChill Soft Cooler — Best for Tank Wells
Price: $ | Buy from: Pelican ExoChill Soft Cooler on Amazon
Pelican is one of the most trusted names in paddling gear — they make kayaks, dry boxes, and protective cases used by professionals. The ExoChill Soft Cooler brings that same design discipline to an affordable soft cooler that was specifically sized to fit most kayak tank wells.
The ExoChill measures 18.75 x 13.75 x 5 inches, which hits the sweet spot for sit-on-top tank well dimensions. The 420 Denier exterior resists the kind of abrasion you get when sliding a cooler in and out of a tank well over the course of a season. The 0.5-inch insulation keeps contents cold for several hours on a hot day — not overnight, but sufficient for a full day paddle.
The 17L capacity is generous for the size. You can fit a respectable amount of food and drinks alongside a block of ice, and the shoulder strap means you can carry it to and from the launch without a second thought. The soft sides also mean it can compress slightly to fit tank wells that are a bit on the narrow side — something the hard Engel drybox cannot do.
Where the ExoChill falls short is ice retention. This is not a 2-day cooler. For summer fishing trips that run 8+ hours in direct sun, you’ll want to pack more ice than you think or use a hard drybox. But for a morning paddle or an afternoon trip, the ExoChill more than delivers.
Key Specifications
- Capacity: 17L
- Exterior: 420 Denier polyester — abrasion resistant
- Insulation: 0.5-inch foam
- Dimensions: 18.75 x 13.75 x 5 inches (tank-well optimized)
- Carry: Removable shoulder strap + side handles
- Price Range: $
4. TidyFriend Kayak Seat Cooler — Best Budget Behind-Seat
Price: $ | Buy from: TidyFriend Kayak Seat Cooler on Amazon
The TidyFriend Kayak Seat Cooler has over 1,283 reviews and a 4.4-star rating — not because it does anything fancy, but because it does exactly what it says it will do for under $40.
This is the narrow, compact behind-seat option. The design is intentionally slim so it doesn’t crowd the cockpit or add awkward width to the kayak’s profile. It uses the same bungee ball mounting system as the Yakhacker — four bungee balls clip through the seat frame and hold the cooler in place even when you’re paddling hard through choppy water.
The TidyFriend’s advantage over the Yakhacker is price and compactness. If you mostly want somewhere to store a few drinks and snacks and you don’t need 16 hours of cold retention, this is a smarter spend. The disadvantage is capacity — at roughly 8L, it’s more limited than the Yakhacker’s 10L, and the insulation is solid but not exceptional. For shorter paddles or casual trips, it’s all you need.
Note: like all behind-seat coolers, this requires a lawn-chair style tubular seat frame. It won’t work on molded or frame-free seats.
Key Specifications
- Capacity: Approx 8L
- Mounting: 4 bungee ball cords included
- Exterior: Waterproof coated fabric
- Access: Zipper top
- Weight: Very light
- Price Range: $
5. Engel UC30 Fishing Drybox Cooler — Best for Kayak Fishing
Price: $$ | Buy from: Engel UC30 Fishing Drybox Cooler on Amazon
If you’re a serious kayak angler, the Engel UC30 Fishing Drybox Cooler is built for you. It takes the same proven hard drybox construction as the Engel 19qt and scales it up to 30 quarts — with built-in fishing rod holders.
Those rod holders are the key differentiator. Proper rod management on a kayak is always a challenge — you need your rod accessible but secured, not bouncing around in the hull or clamped to a mount where it’s hard to grab quickly. The UC30 puts rod holders on the side of the cooler so your setup is right there when you’re stationary or drifting.
The 30qt capacity handles a full day’s worth of food, drinks, and ice with room to spare. The air-tight EVA gasket and polystyrene foam insulation keep everything cold for 2+ days, same as the smaller model. Stainless steel latches, hinged lid, doubles as a seat — all the same features that make the 19qt a proven performer.
The honest trade-off: the UC30 is bigger and heavier than the 19qt. It needs a larger tank well to fit — check your kayak specs before buying. Most fishing kayaks in the 12–14 foot range can accommodate it, but it won’t fit in recreational or touring kayaks with smaller wells. If you have the room, it’s a better choice for fishing trips. If you don’t, the 19qt is the smarter pick.
Key Specifications
- Capacity: 30qt
- Rod Holders: Built-in
- Seal: Air-tight EVA gasket
- Ice Retention: 2+ days
- Closure: Stainless steel industrial latches
- Weight: Moderate
- Price Range: $$
6. RTIC Ultra-Tough Soft Cooler 30 Can — Best Soft Cooler for Serious Paddlers
Price: $$ | Buy from: RTIC Ultra-Tough Soft Cooler on Amazon
RTIC built their brand on one simple premise: match YETI’s performance at a substantially lower price. With 6,485 reviews and a 4.5-star rating, the Ultra-Tough Soft Cooler 30 Can makes a strong case that they’ve delivered on it.
The exterior is genuinely tough. High-denier coated polyester resists the kind of punishment a kayak accessory takes — rocky launches, gear stacking, UV exposure, the occasional drag across a gravel bar. The leak-proof zipper and insulated liner keep things properly cold for 1–2 days with a good ice pack ratio. The 30-can capacity is one of the largest soft coolers in this roundup, which is valuable when you’re out for a full day with a group.
Where the RTIC works well on a kayak: bungee-cord it to the stern cargo area, and it stays put for the day. It doesn’t have kayak-specific mounting like a seat-back cooler, but its rugged handles and lash points give you options. It also converts seamlessly to land use — bring it to camp after you leave the water.
If you already own an RTIC and are reading this looking for a justification to buy something kayak-specific, you probably don’t need to. A properly bungeed RTIC in the stern cargo area is a perfectly capable kayak cooler. If you’re buying new and want something more purpose-built, the Engel 19qt is the better choice.
Key Specifications
- Capacity: 30 cans / approx 20qt
- Exterior: Ultra-tough high-denier polyester
- Seal: Leak-proof zipper and liner
- Ice Retention: 1–2 days
- Carry: Shoulder strap + top handles
- Price Range: $$
7. YETI Hopper Flip 12 — Best Premium Kayak Cooler
Price: $$$ | Buy from: YETI Hopper Flip 12 on Amazon
The YETI Hopper Flip 12 is the most expensive cooler in this roundup, and it earns that price tag with a combination of features you won’t find anywhere else at any price.
The DryHide shell is YETI’s proprietary high-density fabric — waterproof, puncture-resistant, and UV-resistant. Spend enough days on the water and UV degradation kills ordinary cooler fabrics. The DryHide resists it. The Hydrolok zipper is fully leakproof, and the front flip-open design is ideal for kayaking: instead of having to lift a top-opening lid or unzip a top-access bag that requires two hands, you flip the front panel down and your drinks are right there. That matters when you’re balancing a paddle.
The 12qt capacity is compact, which for kayaking is actually a feature. It fits in tank wells, can be bungeed to the stern, and doesn’t significantly affect kayak balance. The external lash points mean you can secure it to any bungee system without improvising. And the 5-year YETI warranty covers more than any other cooler in this roundup.
The rating — 4.2 stars out of 4,748 reviews — is slightly lower than the Engel because YETI buyers have high expectations and are sometimes disappointed by price-to-performance ratio. For casual day paddlers, the RTIC delivers 90% of the performance at half the cost. If you want the best — the construction, the warranty, the brand — the Hopper Flip 12 is it.
Key Specifications
- Capacity: 12qt
- Shell: DryHide — waterproof, puncture-resistant, UV-resistant
- Zipper: Hydrolok — fully leakproof
- Lid Design: Front flip-open
- External Attachments: Lash points included
- Warranty: 5-year YETI warranty
- Price Range: $$$
Kayak Cooler Buying Guide
Kayak Cooler Types: Which Style Fits Your Kayak
There are three distinct types of kayak coolers, and which one is right for you depends entirely on your kayak’s storage layout and how you paddle.
Behind-seat coolers attach to lawn-chair style tubular seat frames. They sit directly behind the seat back, putting drinks and snacks within arm’s reach. If you have a sit-on-top fishing kayak with a mesh or fabric seat mounted on a tubular frame, behind-seat coolers work perfectly. If you don’t, they won’t attach. The Yakhacker and TidyFriend are the top options here.
Tank-well coolers drop into the oval-shaped cargo area behind the seat on most sit-on-top kayaks. These can be hard-sided dryboxes like the Engel models or soft coolers like the Pelican ExoChill. Tank wells typically run 12–14 inches wide — measure yours before buying. This type gives you more total volume but requires you to stop paddling and rotate to access it.
Bungee-cord secured coolers sit in the stern cargo area under the bungee system. General-purpose soft coolers like the RTIC and YETI Hopper can be secured this way. Not as purpose-built as tank-well or seat-back options, but works fine if you already own a quality soft cooler.
Capacity: How Much Do You Actually Need
For a solo day paddle of 4–6 hours, 15–20qt is plenty for food, drinks, and ice. The Engel 19qt is the benchmark here. For full-day trips over 8 hours, especially kayak fishing where you might be out from dawn to dark, 25–30qt becomes worthwhile — that’s where the Engel UC30 and RTIC Ultra-Tough shine.
Behind-seat coolers in the 8–10L range are designed for drinks and snacks only, not full meal storage. They complement a larger tank-well cooler rather than replace it on longer trips.
One practical note: the ice takes up volume. A 20qt cooler filled with a 2:1 ice-to-food ratio gives you about 7 quarts of actual food and drink space. Plan accordingly.
Ice Retention: What the Numbers Mean on the Water
Cooler companies advertise ice retention in days, but real-world kayak conditions are harder than a shaded lab. Direct summer sun heats a cooler surface fast. Every time you open the lid, you let warm air in. And a hard drybox sealed tight will always outperform a soft cooler of the same advertised retention spec.
In practice: soft coolers like the Pelican ExoChill last 4–6 hours on a hot day; quality soft coolers like the RTIC last 24+ hours with minimal opening; hard dryboxes like the Engel last 48+ hours with a proper block-ice ratio; and premium options like the YETI Hopper last 3+ days with quality packing.
Use block ice instead of cubed when possible — it melts more slowly. A 5-pound block in the bottom of an Engel drybox will outlast two bags of cubed ice in the same space.
Mounting and Attachment: Keeping Your Cooler Secure
A cooler that shifts when you hit a wake throws off your balance and is a paddling hazard. Secure it before you push off.
Behind-seat coolers come with their own bungee ball mounting hardware and are the most secure type — they’re locked to the seat frame and aren’t going anywhere. Tank-well hard dryboxes typically have lash points or handles you can clip a short bungee through; run the bungee through the handle and clip it to the kayak’s bungee anchor points. For stern-area soft coolers, thread the kayak’s bungee system through the cooler’s carry straps and clip it tight. Two points of contact are better than one.
If you’re paddling in significant chop or planning whitewater, bring a short cam strap to supplement the bungee system for any cooler stored in the tank well.
Hard vs. Soft: The Trade-offs That Matter for Kayaking
Hard dryboxes (Engel) win on ice retention, waterproofing, and durability. A hard drybox submerged in a capsize will protect its contents; a soft cooler may not. For kayak fishing where you’re out all day in summer heat, hard is better.
Soft coolers (RTIC, YETI, Pelican ExoChill) win on flexibility and multi-use. They can compress slightly to fit awkward spaces, they’re lighter, and they go from kayak to camp to grocery run without changing anything. The trade-off is ice retention and the fact that soft materials can degrade with repeated UV exposure.
For most paddlers, the answer is both: a hard drybox in the tank well for food and drinks that need to stay cold all day, and a small behind-seat soft bag for things you want quick access to.
Frequently Asked Questions
What is the best kayak cooler for 2026?
The best kayak cooler for most paddlers in 2026 is the Engel 19qt Drybox Cooler. It fits standard sit-on-top tank wells, keeps ice for two full days, and the air-tight EVA gasket seal keeps the interior bone dry even if the kayak tips. With over 9,500 Amazon reviews, it’s the most proven kayak cooler on the market. For paddlers who want cold drinks close at hand without reaching the tank well, the Yakhacker Seat Back Cooler is the best behind-seat option.
What size cooler fits in a kayak tank well?
Most sit-on-top kayak tank wells fit coolers in the 15–20qt range. The Engel 19qt is the most popular tank-well fit, and the Pelican ExoChill (17L, 18.75 x 13.75 x 5 inches) is specifically dimensioned for tank wells. Measure your tank well opening before buying — most standard openings are 12–14 inches across. Soft coolers have a slight advantage since they can flex slightly to fit irregular shapes that a hard drybox cannot.
Can I use a regular cooler on a kayak?
You can, but kayak-specific designs work significantly better. Standard coolers are typically too bulky for tank wells, lack mounting points, and can shift your balance in choppy water. Kayak-specific coolers are sized for kayak storage spaces and designed with secure attachment in mind. If you do use a general cooler, bungee it to the stern cargo area with at least two points of contact.
What is a behind-seat kayak cooler?
A behind-seat kayak cooler is a soft insulated bag designed to attach to the back of lawn-chair style kayak seat frames using bungee ball cords. They sit directly behind your back, keeping drinks and snacks within arm’s reach while you paddle. They only work with kayaks that have tubular lawn-chair style seat frames — the kind standard on most sit-on-top fishing kayaks. The Yakhacker and TidyFriend are the top-rated options.
How do I keep a cooler from sliding off my kayak?
Run bungee cords through the cooler’s handles and clip them to the kayak’s bungee anchor points. Most sit-on-top kayaks have stern bungee systems designed for exactly this purpose. Hard dryboxes like the Engel have lash points that make securing easier. Behind-seat coolers use a dedicated bungee ball system that locks to the seat frame. In rough water, add a cam strap through the cooler’s handle as a backup to the bungee system.
Is a YETI worth it for kayaking?
The YETI Hopper Flip 12 is worth the premium if you paddle frequently in harsh conditions or go on multi-day trips, and you want the best construction and longest warranty in the category. The DryHide shell handles UV, abrasion, and punctures better than competitors, and the 5-year warranty is the longest in the roundup. For most day paddlers, the RTIC Ultra-Tough provides similar performance at roughly half the price. The YETI is a legitimate upgrade; whether it’s the right one depends on how seriously you paddle.
Can you tow a cooler behind a kayak?
Yes — the CUDDY Floating Cooler is designed to be towed behind a kayak, SUP, or canoe. It’s buoyant, unsinkable, and has tow points. The 40qt floating cooler is ideal for river trips, group paddles, and island-camp expeditions where you need more cold storage than the kayak can hold. At typical recreational paddling speeds, towing a floating cooler adds minimal drag.
Final Thoughts
The Engel 19qt Drybox Cooler is the best kayak cooler for most paddlers — it’s the right size for standard tank wells, keeps ice long enough for any day trip, and its proven track record across thousands of reviews means you’re not taking a gamble. If you want drinks within arm’s reach while you paddle, pair it with a Yakhacker seat-back cooler and you’ve covered every storage scenario a sit-on-top kayak has to offer.
For anglers who spend full days on the water, the Engel UC30 with built-in rod holders is worth the upgrade. For paddlers who want the best soft cooler without the YETI price, the RTIC Ultra-Tough is the smart buy. And if budget is the priority, the TidyFriend behind-seat cooler does its job for under $40 without drama.
The wrong cooler ruins a trip. The right one disappears into the kayak and stays cold all day. Any of the seven options above will do exactly that — pick the one that fits how you paddle.
If you have questions about kayak cooler fit or mounting, leave a comment below — we read every one. And if you’re outfitting a new fishing kayak, check out our roundup of the best fishing kayaks and the best dry bags for kayaking for more gear that fits and stays put on the water.
The 7 Best Waterproof Pants for Kayaking in 2026
Kayak Gear Review Hub may earn a commission from qualifying purchases made through links on this page. This does not affect our editorial independence or product rankings.
The best waterproof pants for kayaking in 2026 are the Outdoor Research Helium Rain Pants — they weigh just 4.1 oz, pack to fist size, and feature ankle zips that let you pull them on without bending down to remove your water shoes. For kayak anglers who need maximum lower-body protection in serious conditions, the Helly Hansen Impertech Fishing Bibs are our top specialist pick — bib-style coverage that closes the waist gap that regular pants leave open when you’re seated. We reviewed 7 options across budget, mid-range, and specialized categories to find the right pair for every type of paddler, from casual recreational kayakers to hardcore all-weather anglers.
You know that feeling on a cold October morning when you’re launching into flat water, your paddle catches the surface wrong on the first stroke, and a sleeve of cold water runs straight down your arm into your lap? Now imagine that’s your legs for the next four hours because you skipped the rain pants.
Lower-body waterproofing is the most neglected part of kayak kit. Paddlers spend good money on dry bags, life jackets, and paddles — then sit in cotton jeans while spray builds up on every stroke. The right waterproof pants weigh almost nothing in your hatch, slip on in 60 seconds at the launch, and make miserable weather genuinely comfortable.
Here are the seven best options in 2026, tested and ranked for kayakers.
1. Outdoor Research Helium Rain Pants — Best Overall
Price: $$ | Buy from: Amazon
The Outdoor Research Helium Rain Pants are the benchmark by which we measure every other rain pant in this category. At 4.1 oz — lighter than most water bottles — they occupy almost no space in your hatch, they’re packable to fist size, and OR backs them with a lifetime guarantee. For kayakers, the 2.5-layer Helium nylon construction and critically seam-taped construction means these will keep water out in sustained heavy rain, not just paddle drip.
What makes them particularly well-suited to kayaking is the ankle zip design. You can step into them over your water shoes or neoprene booties without contorting — a small detail that matters enormously when you’re on a wet dock at 6am. Other rain pants with elastic ankles require you to take your footwear off entirely, which means a barefoot dance on gravel or a wet dock.
The honest limitation here is the size range: OR tops out at 2XL. If you’re a larger paddler, this isn’t your option. The breathability is also moderate for high-output paddling — on a strenuous touring day you may feel some clamminess on the inside. But for most recreational paddlers doing day trips in variable weather, the Helium Rain Pants are as close to perfect as this category gets.
Key Specifications
- Material: 2.5-layer Helium nylon
- Waterproofing: Critically seam-taped with DWR finish
- Weight: 4.1 oz
- Entry: Ankle zips
- Packable: Yes — fist-sized
- Sizes: XS–2XL
- Warranty: Lifetime guarantee
- Price Range: $$
2. Helly Hansen Impertech Fishing Bibs — Best for Serious Kayak Anglers
Price: $$$ | Buy from: Amazon
The Helly Hansen Impertech Fishing Bibs solve a problem that most rain pants don’t address at all: the waist gap. When you’re seated in a kayak, your jacket rides up and your pants ride down, creating a gap right at your lower back and sides. In moderate conditions it’s uncomfortable. In heavy rain or wave action, it’s a slow soak. The Impertech Bibs close that gap entirely with adjustable shoulder straps that hold the bib in position regardless of how you’re moving.
Helly Hansen built its reputation in commercial fishing, which means these bibs are designed for conditions that most paddlers will never actually face. The Helox+ PVC-free waterproof coating and fully waterproof seams handle sustained exposure. Reinforced knees and seat mean you can crawl on rocks at a put-in, drag the kayak up a gravel beach, and kneel to bail without destroying the fabric. Reflective details are a practical safety touch for dawn and dusk launches.
The trade-off is weight and bulk. These are committed gear — you bring them because you know the day is going to be wet, not as a just-in-case layer. They don’t pack small, and they’re heavier than any of the hiking-oriented options on this list. For kayak anglers who go out regardless of the weather, that’s a reasonable trade. For casual recreational paddlers, the OR Helium is the better daily driver.
Key Specifications
- Material: PVC-free Helox+ waterproof coating
- Waterproofing: Fully waterproof, seam-sealed
- Style: Bib with adjustable shoulder straps
- Reinforcement: Knees and seat
- Sizes: S–4XL
- Warranty: 1 year
- Price Range: $$$
3. Marmot PreCip Eco Full-Zip Pants — Best for Easy On/Off at the Launch
Price: $$ | Buy from: Amazon
The Marmot PreCip Eco Full-Zip Pants earn their spot on this list with one feature that every kayaker will immediately appreciate: a full side zip that runs from the ankle all the way to the hip. You can stand on a dock in your water shoes, unzip both legs, step in, and zip up in under a minute. No sitting down on wet concrete to pull your boots off, no balancing act, no fuss.
The NanoPro Eco membrane is Marmot’s genuinely waterproof technology — this is not just a DWR coating that will wet out after a season. The fully seam-taped construction handles sustained rain, not just paddle spray. And like the OR Helium, they pack into their own pocket for easy hatch or dry bag storage. Marmot’s lifetime limited warranty means they’ll address manufacturing defects — a reassurance you don’t get from budget options.
The breathability is moderate — a common limitation in the 2.5-layer category. On warm, high-output paddling days you may feel warmth building inside. The price sits solidly in the mid-range, and women should check the women’s-specific version for a better cut. These are an excellent year-round option for recreational kayakers who do occasional multi-day trips and want a reliable packable layer.
Key Specifications
- Material: 2.5-layer NanoPro Eco nylon
- Waterproofing: Fully seam-taped, NanoPro Eco membrane
- Entry: Full side zip (ankle to hip)
- Packable: Yes — into own pocket
- Sizes: XS–3XL
- Warranty: Lifetime limited
- Price Range: $$
4. Columbia Men’s Watertight Pants — Best Mid-Range Value
Price: $$ | Buy from: Amazon
Columbia’s Watertight Pants are the most reviewed mid-range option in this category, with 4.5 stars across 3,100+ Amazon reviews. The Omni-Tech membrane is Columbia’s proprietary waterproof/breathable technology — it uses a microporous structure that blocks liquid water but allows vapor to escape. That’s a genuine membrane, not a coating, which means it won’t simply wet out over time the way DWR finishes do.
The seam-sealing is critical here. A lot of rain pants at this price have a waterproof fabric but unsealed seams — water gets in at every stitch line within minutes of hard rain. Columbia seals the seams on the Watertight, making them genuinely reliable in the conditions you’ll actually encounter on the water. The zippered leg hem gussets adjust the opening for various footwear, though they don’t offer the full ankle-to-hip zip that the Marmot does.
The limitation is practical: getting them on quickly over boots or neoprene booties requires a bit of seated contortion. Carry them in your dry bag and plan to put them on at the car before launching. For the price point and brand reliability, these are a strong recommendation for casual paddlers who want a proven option without the premium hiking brand markup.
Key Specifications
- Material: 100% nylon with Omni-Tech membrane
- Waterproofing: Omni-Tech — seam-sealed waterproof and breathable
- Entry: Zippered leg hem gussets
- Pockets: Secure zip pockets
- Sizes: XS–3XL
- Warranty: Limited
- Price Range: $$
5. Carhartt Men’s Shoreline Pant — Most Durable
Price: $$ | Buy from: Amazon
The Carhartt Shoreline Pant is built for people who are hard on gear. The 1000 denier polyester shell is significantly heavier-duty than the 20D or 40D nylons you see in hiking-oriented rain pants — it’s the same weight class as work pants and outerwear. If you’re regularly launching off rocky shorelines, dragging your kayak over gravel, crawling around on boat ramps, and kneeling to secure tie-downs, the Carhartt will outlast the OR Helium by years.
The articulated knees are a practical detail. When you’re stepping into a low sit-on-top kayak or climbing out on a steep bank, you bend hard at the knee — standard rain pant construction pulls and fights you. The articulated cut moves with you instead. The zip-to-thigh leg opening means you can get these on over hiking boots without crouching to ankle level, and the heavy-duty YKK zippers won’t fail in cold or salt-loaded air.
What you trade for durability is weight and packability. The Carhartt Shoreline doesn’t compress into your hatch easily — these are the rain pants you wear to the put-in, not the pair you stash as an emergency layer. They’re also at the warm end of waterproof pants, which is a feature in cold conditions and a limitation on warm days. For year-round lake and bay paddlers who put their gear through real punishment, the Shoreline is the most honest recommendation.
Key Specifications
- Material: 1000 denier polyester
- Waterproofing: Waterproof and wind resistant
- Entry: Zip-to-thigh leg opening
- Hardware: Heavy-duty YKK zippers
- Cut: Articulated knees
- Sizes: S–5XL
- Warranty: Carhartt full swing warranty
- Price Range: $$
6. NRS Endurance Splash Pants — Best Kayak-Specific Option
Price: $$ | Buy from: Amazon
The NRS Endurance Splash Pants are the only kayak-specific option on this list, and they deserve a clear-eyed explanation of what they actually do. These are splash pants, not rain pants. The 40D nylon shell is water-resistant and will handle paddle drip, spray, and light splashing — but in sustained heavy rain, they will eventually wet through. That’s an honest limitation, and it matters for how you use them.
Where they genuinely shine is the latex neo gasket at the waist. Most rain pants at the waist are just an elastic drawstring — fine for hiking, but inadequate when you’re sitting in a kayak cockpit for three hours with water pooling on the deck. The latex gasket creates a real seal, keeping spray and splashed water out of the pant waist the way a drysuit gasket keeps water out of a wetsuit. The suspender design keeps the pants in position during aggressive paddling — no riding down, no bunching.
NRS is a paddler’s brand with genuine credentials in the whitewater and sea kayaking community. The reinforced seat and knees are designed for cockpit use. If you paddle primarily in warm weather and your main concern is the spray from your paddle stroke rather than sustained rain, these are arguably more suited to kayaking than any waterproof hiking pant on this list. Just understand what they are.
Key Specifications
- Material: 40D nylon with latex neo gasket
- Waterproofing: Water-resistant splash protection (not fully waterproof in heavy sustained rain)
- Design: Bib with adjustable suspenders
- Reinforcement: Seat and knees
- Sizes: XS–XXL
- Warranty: 1 year
- Price Range: $$
7. Frogg Toggs All Sport Rain Pants — Best Budget Pick
Price: $ | Buy from: Amazon
At under $20, the Frogg Toggs All Sport Rain Pants have more Amazon reviews than every other option on this list combined — over 8,200 ratings. There’s a reason for that: they work. The polypropylene non-woven shell is genuinely waterproof. They’re lightweight, they pack small, and they cost less than a cup of coffee at most marina coffee bars.
The catch is durability. The non-woven material is not particularly resistant to snags, abrasion, or sharp edges. If you’re crawling over a rocky launch site or stuffing them repeatedly into a dry bag, they will eventually tear. They are not designed for season-after-season use the way the OR Helium or Marmot PreCip are. Think of them as a consumable layer that you replace every season or two, not an investment piece.
For what they are — an ultra-affordable, genuinely waterproof rain pant that you can keep in your dry bag and not think about until you need them — they’re difficult to argue with. They’re ideal as a first rain pant for someone just getting into kayaking, as a backup layer on top of other wet weather gear, or as the pair you keep in the car because you’ve already retired the good ones to the hatch.
Key Specifications
- Material: Polypropylene non-woven
- Waterproofing: 100% waterproof
- Entry: Elastic waist, snap-close leg openings
- Sizes: S–3XL
- Warranty: Limited manufacturer warranty
- Price Range: $
Waterproof Pants for Kayaking: Buying Guide
Rain Pants vs. Splash Pants: Which Do Kayakers Actually Need?
This distinction trips up more paddlers than any other factor in this category. Rain pants are fully seam-taped and use a waterproof membrane — they’re designed to keep you dry in sustained rainfall measured in hours, not minutes. Splash pants use a water-resistant coating and may incorporate latex gaskets or seals, but they’re not built for overhead precipitation.
For kayaking specifically, the question comes down to what conditions you paddle in. If you’re on the water primarily in calm summer weather dealing with paddle drip and the occasional bow splash, splash pants like the NRS Endurance may actually serve you better — they’re more comfortable, more breathable, and purpose-designed for cockpit use. If you paddle year-round in the Pacific Northwest, northern lakes, or anywhere with serious rain seasons, fully waterproof pants are the right call.
The honest answer is that most serious kayakers want both: splash pants for warm-season use and waterproof pants for cold and wet conditions. If you’re buying one pair, buy rain pants. They handle everything splash pants handle, plus actual rain.
Waterproofing Ratings and What They Mean for Paddlers
Waterproofing is measured in hydrostatic head — the height in millimeters of water column a fabric can resist before leaking. A 5,000mm rating handles light to moderate rain. A 10,000mm rating handles heavy rain and sustained exposure. A 20,000mm rating is mountaineering-grade protection.
For kayaking, a 10,000mm rating is the practical target for serious use. Light recreational paddlers can get away with 5,000mm or even unrated DWR-coated shells for splash protection. The OR Helium and Columbia Watertight both offer genuine 10,000mm-equivalent protection through their membrane technologies. The Frogg Toggs are unrated but waterproof in practice — the polypropylene material doesn’t have a formal hydrostatic head but passes real-world rain tests.
One thing to watch for: seam taping. A 10,000mm fabric with unsealed seams will still leak through every needle hole within minutes of rain. Fully seam-taped construction, like the OR Helium, Marmot PreCip, and Columbia Watertight all feature, is as important as the fabric waterproofing rating itself.
Bib vs. Waist Pants: The Kayak-Specific Case for Bibs
When you’re hiking or standing at a stream bank, waist-height rain pants work fine. When you’re seated in a kayak cockpit for three hours, the gap between your jacket hem and your pant waist becomes a real problem. Every time you reach forward for a paddle stroke, your jacket rises slightly and your pants settle. Over an hour, water works its way in. Over three hours in a driving rain, you’re soaked from the waist down despite wearing waterproof pants.
Bib-style waterproof pants — like the Helly Hansen Impertech and the NRS Endurance Splash Pants — solve this by extending coverage up to the mid-torso and securing with shoulder straps. The waist gap is completely eliminated. For kayak anglers doing full-day trips in serious weather, bibs are a meaningful upgrade. The trade-off is that bibs are harder to get on and off quickly, and they add warmth that can be uncomfortable in summer.
If you’re buying your first pair of waterproof pants for kayaking, waist pants are fine for most conditions. If you’ve been paddling for a few seasons and you know you’re going out in serious rain, add a pair of bibs to the kit.
Weight and Packability: The Most Underrated Factor
The best rain pants are the ones you actually have with you. This sounds obvious, but it changes how you should think about buying decisions. A pair of heavy, non-packable waterproof pants at the back of the truck doesn’t help you on a day trip where the weather turns at mile six. A 4.1 oz packable pair in your hatch is available when you need it.
The OR Helium and Marmot PreCip are the packable leaders on this list. The Frogg Toggs are lighter but less durable. The Carhartt and Helly Hansen bibs are committed gear that you wear to the water rather than pack.
Think about where the pants will live. If they’re hatch gear that stays in the kayak, weight and pack size matter enormously. If they’re your primary wet-weather layer worn to the launch, a heavier-duty option makes sense. Most dedicated kayakers end up with one packable pair for the hatch and one heavier pair for known-bad-weather days.
Entry and Exit Design: Why Leg Zips Matter on the Water
Getting rain pants on and off is more complicated than it sounds on a kayak trip. At the launch, you may have wet feet, neoprene booties, sandals with straps, or water shoes with drainage holes that catch the pant hem. At the takeout, you may be tired, cold, and working on a wet dock or rocky shoreline.
Leg zips — whether ankle zips like the OR Helium or full side zips like the Marmot PreCip — make the whole process dramatically easier. Ankle zips let you step in without removing footwear. Full side zips let you open the pant completely flat, step in, and zip from bottom to top. Regular elastic ankles require you to either take your footwear off or do an awkward bunching maneuver that leaves material bunched above the boot.
For most kayakers, ankle zips are the minimum feature worth seeking out. If you wear bulkier footwear or regularly put rain pants on at the water’s edge rather than the parking lot, the full side zip on the Marmot PreCip is worth the extra cost.
Frequently Asked Questions
What are the best waterproof pants for kayaking?
The best waterproof pants for most kayakers are the Outdoor Research Helium Rain Pants — they weigh just 4.1 oz, pack to fist size, and feature ankle zips for easy on/off without removing footwear. The lifetime guarantee from OR means you’re buying this once. For kayak anglers wanting maximum protection in heavy conditions, the Helly Hansen Impertech Fishing Bibs offer bib-style coverage that seals at the waist when you’re seated — a design feature that standard waist pants can’t match.
Do I need waterproof pants for kayaking?
For kayaking in rain or cold conditions, yes. Your lower body takes paddle drip on every stroke, spray from wind chop, and water from bow splash on bigger water. Even on calm days, launching and landing often means stepping in shallow water or dragging your kayak on a wet bank. Waterproof pants weigh almost nothing in your hatch and turn marginal days into comfortable ones. The OR Helium at 4.1 oz is less than the weight of a phone — there’s no reason not to carry them.
What is the difference between rain pants and splash pants for kayaking?
Rain pants are fully seam-taped with a waterproof membrane — they keep you dry in hours-long sustained rainfall. Splash pants use a water-resistant coating and may add latex gaskets for paddle drip and spray protection, but they will eventually wet through in heavy rain. For warm-weather paddling in calm conditions, splash pants like the NRS Endurance are often enough and more comfortable. For cold water or serious rain — fall and spring paddling in most of North America — use fully waterproof rain pants.
Are bib-style waterproof pants better for kayaking?
For many paddlers, yes. When seated in a kayak, your jacket rides up and your pants settle down, creating a gap at the waist that lets water in. Bib-style pants like the Helly Hansen Impertech close that gap with shoulder straps. For kayak anglers doing full days in heavy rain, that’s a meaningful upgrade. The trade-off is that bibs are heavier, harder to put on and take off, and add warmth that’s uncomfortable in summer. Waist pants are fine for casual recreational paddling; bibs are for serious all-weather paddlers.
How do I put on rain pants at a kayak launch?
The easiest approach is to put them on at the car before you get to the water. If that’s not practical, look for pants with full side zips (Marmot PreCip) or ankle zips (OR Helium) — these let you step in over your footwear without sitting down on a wet surface. Avoid rain pants with plain elastic ankles if you wear boots, neoprene booties, or water shoes with straps. Do not try to put rain pants on while seated in your kayak mid-water.
What waterproofing rating do I need for kayaking?
For casual recreational kayaking in light to moderate rain, any seam-taped waterproof pant works. For serious kayak fishing or multi-day trips in heavy conditions, target 10,000mm hydrostatic head rating or its equivalent — Omni-Tech (Columbia), NanoPro Eco (Marmot), or critically seam-taped 2.5-layer nylon (OR Helium). The number represents how much water pressure the fabric resists before leaking. For reference, 10,000mm equals heavy, sustained rain coverage. Below 5,000mm equals light rain or splash only.
Final Thoughts
For most kayakers, the Outdoor Research Helium Rain Pants are the right answer: ultralight, packable, genuinely waterproof, and backed by a lifetime guarantee that justifies the mid-range price. They earn their spot in the hatch on every trip because you’ll forget they’re there until you need them — and then you’ll be grateful they are.
If you’re a kayak angler who goes out regardless of the weather forecast, step up to the Helly Hansen Impertech Bibs. The bib design eliminates the waist gap that standard rain pants leave open, and the commercial fishing heritage means they’re built for sustained, serious use.
Whatever you choose, don’t skip the lower-body layer. Wet legs make a miserable paddle. The right waterproof pants turn a soggy day into a comfortable one. Also check out our guide to the best rain jackets for kayaking to complete the system — a waterproof jacket paired with waterproof pants makes even the worst forecast look manageable.
If you have questions about waterproof pants for kayaking or want to share what’s working for you, leave a comment below — we read every one.
The 7 Best Waterproof Phone Cases for Kayaking in 2026
Kayak Gear Review Hub may earn a commission from qualifying purchases made through links on this page. This does not affect our editorial independence or product rankings.
The best waterproof phone case for kayaking is the JOTO Universal Waterproof Pouch for most paddlers. With IPX8 protection rated to 100 feet, touch-screen compatibility, a floating design that keeps your phone on the water’s surface if you drop it, and a price tag under $10, it is the most thoroughly proven option in the category — backed by over 85,000 Amazon reviews. For paddlers who want a premium hard-shell case they never have to remove, the Pelican Marine Waterproof Phone Pouch offers lifetime-guaranteed marine-grade protection at a mid-range price. We evaluated nine waterproof phone cases and pouches across five criteria — waterproof rating, floating ability, touch screen sensitivity, size compatibility, and value — to bring you the best options for 2026, from under $10 to $90.
1. JOTO Universal Waterproof Pouch — Best Overall
The JOTO Universal Waterproof Pouch is the most reviewed waterproof phone pouch on Amazon — 85,000+ ratings across years of paddlers, swimmers, and beach-goers putting it through its paces. That review count is not an accident. JOTO has been refining this pouch design for years, and the result is a case that works reliably, costs almost nothing, and fits any phone you own now or will own in the future.
The core design is a clear plastic pouch with a roll-top or lock-style seal that creates an airtight, waterproof barrier around your phone. The clear front allows full touch-screen use, the clear back allows the camera to shoot through, and the included lanyard keeps the whole package around your neck so you are not holding your phone while paddling. The IPX8 rating means it is waterproof to at least 30 meters (100 feet) — far beyond what any capsize scenario requires.
What separates the JOTO from competitors is the floating design. If this pouch hits the water, it floats on the surface. You have time to reach over and grab it. A non-floating case sinks in seconds, and chasing a sinking phone in moving current is a scenario you want to avoid entirely. If you paddle alone, your phone is potentially your lifeline to emergency services — the floating design is not just a convenience feature, it is a safety feature.
The honest limitation is that it is a pouch, not a case. You are handling your phone inside a plastic bag, which is slightly awkward for extended navigation or photography sessions. The touch sensitivity is good but not as crisp as a bare screen. For occasional reference — checking GPS, taking a photo, answering a call — it works well. For heavy phone use on the water, a hard-shell case like the Lifeproof FRE might serve you better.
Key Specifications
- Waterproof Rating: IPX8 (100 feet / 30 meters)
- Max Phone Size: Up to 7 inches (fits iPhone 15 Pro Max, Galaxy S24 Ultra, and more)
- Touch Screen: Full compatibility
- Floating: Yes
- Lanyard: Included
- Face ID: Compatible
- Camera: Clear back panel for photos/video
- Price Range: $
2. Pelican Marine Waterproof Phone Pouch — Best Mid-Range
The Pelican Marine Waterproof Phone Pouch carries the most trusted brand name in waterproof gear for a reason. Pelican is the company that builds the hard cases protecting $10,000 cameras on expedition film shoots, and they have applied that same engineering philosophy to a phone pouch designed specifically for marine environments — salt water, spray, capsize, and all.
The IPX8 waterproof certification means full submersion protection, and the marine-grade construction of the materials means it holds up to the abuse of a real day on the water — sun, salt, repeated sealing and unsealing, and being stuffed into a PFD pocket and forgotten about. The full touch and Face ID compatibility is seamless, and the lanyard attachment point is solid rather than the flimsy loop you get on budget options.
The reason to choose Pelican over JOTO comes down to one word: guarantee. Pelican’s lifetime guarantee is the real deal — they stand behind their products with actual replacement or repair, not a 30-day return window. For paddlers who are on the water constantly and want to buy once and forget about it, that guarantee has real value.
The meaningful weakness is that this pouch does not float. If you drop it overboard, it sinks. At $29.99, that is a painful loss — and more importantly, you have lost your emergency communication device in the process. If you paddle in conditions where a capsize is plausible, seriously consider attaching a float leash or keeping the lanyard around your neck at all times. The non-floating design is a genuine compromise for an otherwise excellent product.
Key Specifications
- Waterproof Rating: IPX8
- Max Phone Size: Up to 6.9 inches
- Touch Screen: Full compatibility
- Floating: No — use with neck lanyard
- Lanyard: Attachment point included
- Face ID: Compatible
- Camera: Compatible
- Warranty: Lifetime guarantee
- Price Range: $$
3. Mpow 097 Universal Waterproof Case — Best Value 2-Pack
The Mpow 097 Universal Waterproof Case makes the most practical argument in this category: most people who kayak do it with someone else. The Mpow 097 comes in a 2-pack, which means for about $11, you protect both phones on a paddling trip. That is a value equation that no single-unit competitor can touch.
Beyond the 2-for-1 economics, the Mpow 097 has genuine technical merits. The double-lock seal system — two separate locking mechanisms that must both be engaged — gives an extra layer of confidence that the case is actually sealed before you put it near water. Budget pouches with a single seal can fail if the seal is not engaged properly; the double-lock system makes it much harder to make that mistake. The IPX8 rating to 100 feet matches the JOTO, and the floating design is intact.
The included accessories are also notably generous: both a neck strap and an arm band come in the box, giving you two carry options depending on whether you want the phone accessible at chest level or secured to your arm for paddling. The neck strap is the better option for kayaking specifically — arms go in the water, chests generally do not.
The one compromise with the double-lock system is bulk. The Mpow 097 is slightly wider and heavier than the JOTO pouch, which becomes noticeable if you are trying to stuff it into a PFD chest pocket. For paddlers who carry their phone around their neck rather than in a pocket, this is a non-issue.
Key Specifications
- Waterproof Rating: IPX8 (100 feet)
- Max Phone Size: Up to 6.9 inches
- Touch Screen: Compatible
- Floating: Yes
- Seal System: Double-lock
- Accessories: Neck strap + arm band (both included)
- Pack Size: 2 cases per pack
- Price Range: $
4. Lifeproof FRE Series Waterproof Case — Best Hard Case
The Lifeproof FRE Series Waterproof Case is what serious paddlers buy when they want to stop thinking about their phone’s protection entirely. Instead of carrying a pouch you put your phone into and take it out of at the put-in and take-out, the Lifeproof FRE is the phone case. It goes on when you get the phone, and it comes off — if ever — when you sell it. Every call, every GPS check, every photo happens through it without a second thought about water.
The IP68 waterproof rating covers the case to 6.6 feet (2 meters) for up to one hour — more than adequate for any kayaking scenario, including full capsize and wet re-entry into the kayak. The full-body construction protects the screen, back, corners, and camera lens, and the built-in screen protector means you are not adding a separate layer to manage. Drop protection to MIL-STD-810G standards means the phone survives the combination of water and impact that happens when you flip a kayak in rocky water.
Lifeproof is available for both iPhone and Samsung Galaxy series, which covers the vast majority of paddlers. Compatibility is phone-model specific — check that your exact model is supported before ordering.
The trade-offs are real and worth understanding. The IP68 depth rating (6.6 feet) is lower than pouch-style IPX8 options (100 feet), though it is more than sufficient for kayaking. More importantly: the Lifeproof FRE does not float. For whitewater paddlers or anyone who paddles rough water, attaching a wrist leash to the phone is strongly recommended. Finally, at $89.99, this case costs more than most paddlers spend on their phone case all year — and you will need to buy a new one when you upgrade your phone.
Key Specifications
- Waterproof Rating: IP68 (6.6 feet / 2 meters for 1 hour)
- Phone Compatibility: iPhone 14/15/15 Pro series; Samsung Galaxy S series
- Drop Protection: MIL-STD-810G (up to 6.6 feet)
- Touch Screen: Native (no reduction in sensitivity)
- Floating: No — pair with wrist leash
- Built-in Screen Protector: Yes
- Warranty: Lifetime
- Price Range: $$$
5. OBDAS Waterproof Phone Pouch — Best Touch Sensitivity
The OBDAS Waterproof Phone Pouch has built a reputation on doing one thing better than the competition: touch screen responsiveness. Touch sensitivity through a pouch-style case is the most common complaint in this category — thick plastic, imprecise sealing, and excess material between your finger and the screen all reduce sensitivity. OBDAS has been reviewed repeatedly as the most responsive pouch in the under-$15 segment, which matters if you use your phone for GPS navigation, music, or photography while paddling.
The IPX8 waterproof rating matches category leaders, the floating design prevents loss in a capsize, and the upgraded double-lock closure has been specifically noted in reviews for its reliability compared to single-seal alternatives. The adjustable neck lanyard is comfortable for extended wear, with a breakaway clasp that releases under force — useful if the lanyard catches on something during a capsize.
Where OBDAS trails the JOTO and Mpow is in review volume. At around 14,000 reviews, it has a strong track record but is a less proven quantity than the 85,000-review JOTO. For buyers who prioritize touch sensitivity above all else, OBDAS is the correct choice. For buyers who want maximum peace of mind in a budget pouch, JOTO’s review count speaks for itself.
Key Specifications
- Waterproof Rating: IPX8
- Max Phone Size: Up to 7 inches
- Touch Screen: Highly rated sensitivity
- Floating: Yes
- Closure: Upgraded double-lock
- Lanyard: Adjustable with breakaway clasp
- Face ID: Compatible
- Price Range: $
6. Maxboost Waterproof Phone Pouch — Best for Phone Calls on the Water
The Maxboost Waterproof Phone Pouch solves a problem that most waterproof pouches create: muffled audio. If you have ever tried to make a phone call with your phone inside a waterproof pouch, you know the other person sounds like they are calling from the bottom of a lake. Maxboost built an acoustic membrane into their pouch design — a waterproof layer that transmits sound clearly without creating a gap in the waterproof seal.
For paddlers who use their phone as a communication device on the water — checking in with a fishing partner, taking calls from family during a multi-day trip, or using voice navigation — this acoustic membrane is a meaningful upgrade over pouches that leave callers straining to hear each other. The IPX8 waterproof rating and 100-foot depth protection match the category standard, and the limited lifetime warranty is unusual in the budget pouch segment.
The honest shortcomings: the Maxboost has a lower review count (around 9,800) than the JOTO or Mpow, and its star rating (4.2) is slightly below the category average. It is not a bad product — the unique acoustic feature keeps it on this list — but it is not as proven as the top three options. If audio clarity on calls is not a priority for you, the JOTO or Mpow will serve you better.
Key Specifications
- Waterproof Rating: IPX8 (100 feet)
- Max Phone Size: Up to 6.9 inches
- Acoustic Membrane: Yes — designed for clear audio
- Touch Screen: Compatible
- Floating: Yes
- Camera: Clear back panel
- Pack Option: Available in 2-pack
- Warranty: Limited lifetime
- Price Range: $
7. JOTO Waterproof Phone Pouch XL 6-Pack — Best for Groups
The JOTO Waterproof Phone Pouch XL 6-Pack exists for a specific situation: you are responsible for a group of people on the water, and everyone needs phone protection. Kayak tour operators, summer camp directors, youth sports teams, and extended family lake weekends all have this problem. At under $16 for six IPX8 waterproof pouches that float, the XL 6-Pack solves it completely.
The XL sizing is the key distinction from the standard JOTO pouch. Where the standard pouch fits phones up to 7 inches, the XL version fits phones plus their existing cases — important for paddlers who have a phone in an Otterbox or similar protective case and do not want to remove it before adding the waterproof pouch. The floating design and wrist strap are intact, as is the same trusted JOTO quality behind the #1 pick.
The trade-off with XL sizing is touch sensitivity — more material between your finger and screen means slightly less precise touch response. For reference use only (checking a map, making an emergency call), this is not a problem. For heavy navigation or photography, the standard single-pack JOTO with a tighter fit performs better.
Key Specifications
- Waterproof Rating: IPX8 (100 feet)
- Size: XL — fits phones plus bulky cases
- Touch Screen: Compatible (slightly reduced vs. standard size)
- Floating: Yes
- Pack Size: 6 pouches per pack
- Wrist Strap: Included
- Price Range: $
Waterproof Phone Case Buying Guide
Waterproof Rating: IPX8 vs IP68 — What the Numbers Mean
The two waterproof ratings you will encounter in this category are IPX8 and IP68. Both indicate full submersion capability, but there are differences worth understanding.
IPX8 means the product is waterproof in fresh water at a depth and duration specified by the manufacturer — typically 30 meters (100 feet) for one hour in the phone pouch category. The X in IPX8 means the product has not been tested for dust resistance, only water resistance. This is fine for kayaking, where dust is not a concern.
IP68 is the full dual-standard rating: the first number (6) indicates complete dust protection, and the second number (8) indicates full submersion waterproofing. IP68-rated products are generally phone-specific hard cases like the Lifeproof FRE that are tested to their own manufacturer specifications for depth and duration.
For kayaking, either rating provides more than adequate protection. The key question is not the rating but the depth specification — and both IPX8 pouches (rated to 100 feet) and IP68 hard cases (rated to 6-10 feet) are more than sufficient for any kayaking scenario, including full capsize in rough water.
Floating vs. Non-Floating: The Most Important Feature for Kayakers
Among all the specifications in this category, floating capability is the most important one for kayakers — and it is often overlooked.
A non-floating waterproof case sinks. For casual beach use or poolside lounging, a sinking phone case is an inconvenience — you fish it off the bottom. In a kayaking scenario, particularly a capsize in moving water or open water, a sinking phone is likely gone. The bottom of a river has current-swept debris and poor visibility. The bottom of a lake may be 50 feet down. Even in calm conditions, diving for a phone while managing an overturned kayak, loose gear, and possibly a paddling partner who also capsized is a scenario you do not want to experience.
More importantly, if you paddle alone, your phone is your emergency communication device. Losing it in a capsize means losing your ability to call for help if you are injured or cannot self-rescue. A floating case stays on the surface. You retrieve it after you have righted your kayak or while you are swimming to shore. That is the version of this story with a good outcome.
The JOTO, Mpow, OBDAS, Maxboost, and JOTO XL all float. The Pelican and Lifeproof FRE do not. If you choose a non-floating case, keep it on a neck lanyard or wrist leash at all times on the water — not in a pocket.
Universal Pouch vs. Phone-Specific Hard Case
The fundamental choice in this category is between a universal pouch (works with any phone) and a phone-specific hard case (engineered for your exact model).
Universal pouches offer several advantages for kayakers: they fit any phone, including future upgrades; they are dramatically cheaper; they often have higher waterproof depth ratings; and most of them float. The trade-off is the experience of using a phone inside a bag — slightly reduced touch sensitivity, a bit of awkwardness for extended use, and the process of opening and closing the seal every time you want to access the phone.
Phone-specific hard cases offer native phone use — same touch sensitivity as the bare phone, same form factor, no opening or closing required. The phone is protected every moment you carry it, not just when you remember to put it in a pouch. The trade-offs are the higher cost (typically $60–$90 vs. under $15), the lower waterproof depth rating, the non-floating design, and the fact that you need to buy a new case every time you upgrade your phone.
Most recreational kayakers are well-served by a universal pouch. Serious whitewater or expedition paddlers who want zero friction in their safety gear often prefer a hard case paired with a wrist leash.
Touch Screen Sensitivity: How to Choose
Touch screen sensitivity varies significantly between waterproof pouches, and it matters more than most reviews acknowledge.
The physics of the problem: a plastic pouch creates an air gap between your finger and the phone screen, which reduces capacitive touch sensitivity. Thinner, higher-quality plastic reduces this effect. Tighter-fitting pouches (less excess material) reduce it further. Water on the outside of the pouch can also confuse touch input by acting like additional finger contacts.
In practice: for simple interactions — tapping a navigation button, answering a call, taking a photo — even budget pouches work fine. For extended navigation use, typing, or precision touch (photo editing, detailed map interaction), touch sensitivity becomes a real issue.
If touch sensitivity is important to you, OBDAS is the best-reviewed option in the budget category for this specific attribute. The Lifeproof FRE hard case eliminates the problem entirely with native phone use. The JOTO pouches are adequate for typical reference use but not exceptional.
A practical tip from kayakers: dry your hands before touching the outside of a waterproof pouch. Wet fingers on the outside dramatically reduce touch accuracy because the phone’s touchscreen detects the moisture as phantom inputs.
Size Compatibility: Making Sure Your Phone Fits
Before ordering any waterproof phone pouch, check your phone’s screen size and confirm it falls within the case’s maximum size specification.
Current flagship phone sizes for reference:
- iPhone 15 Pro Max: 6.7 inches
- iPhone 15 Plus: 6.7 inches
- Samsung Galaxy S24 Ultra: 6.8 inches
- Google Pixel 9 Pro XL: 6.8 inches
- Standard flagship size (iPhone 15, Samsung S24): 6.1–6.2 inches
Most standard universal pouches (JOTO, Mpow, OBDAS) fit up to 6.9 or 7 inches, which covers all current flagship phones. If you use a bulky protective case (Otterbox, Lifeproof) on your phone and want to keep it attached when inserting into a waterproof pouch, measure the combined width and height and compare against the pouch’s internal dimensions — or choose the JOTO XL, which is specifically designed for phones with attached cases.
Phone-specific hard cases like the Lifeproof FRE require exact model matching. Verify your phone model before purchasing.
Frequently Asked Questions
What is the best waterproof phone case for kayaking?
The best waterproof phone case for kayaking is the JOTO Universal Waterproof Pouch for most paddlers. It offers IPX8 protection to 100 feet, works with any phone up to 7 inches, floats if dropped overboard, includes a lanyard, and costs under $10. With over 85,000 Amazon reviews, it is the most proven waterproof phone pouch in the category. For a premium option with a lifetime guarantee, the Pelican Marine Waterproof Pouch delivers marine-grade protection at $29.99.
Do I need a floating waterproof phone case for kayaking?
Yes — for kayaking specifically, a floating waterproof case is strongly recommended. If your kayak capsizes or you drop your phone overboard, a non-floating case will sink immediately. A floating case stays on the water surface where you can retrieve it. If you paddle alone, your phone may be your only way to call for help in an emergency — losing it in a capsize is a serious safety risk. Budget pouches from JOTO, Mpow, and OBDAS all float. Hard-shell cases like the Lifeproof FRE do not float, so pair them with a wrist leash if you paddle challenging water.
What waterproof rating do I need for kayaking?
For kayaking, look for IPX8 or IP68 waterproof rating. IPX8 means the case is waterproof to the manufacturer’s specified depth — most budget pouches are rated to 30 meters (100 feet), far more than any kayaking scenario requires. IP68 adds dust-proofing to the waterproof certification. Avoid IPX4 or IPX7 ratings — these are splash-resistant or briefly submersible only and are not reliable protection for a full capsize. Any product on this list meets or exceeds the waterproofing standard needed for kayaking.
Can I use my touch screen through a waterproof phone pouch?
Yes, modern waterproof phone pouches allow touch screen use through the clear plastic front. Touch sensitivity varies — OBDAS has the best reviews for sensitivity in the budget category, while hard-shell cases like the Lifeproof FRE offer native touch response with no reduction. Face ID and fingerprint unlocking generally work through a pouch. Practical tip: dry your hands before touching the outside of a waterproof pouch — wet fingers dramatically reduce touch accuracy on the phone’s capacitive screen.
Can I take photos and videos through a waterproof phone pouch?
Yes — all pouch-style cases have a clear back panel for the camera. Photo quality is slightly reduced compared to shooting with a bare phone, and glare can be an issue in direct sunlight. For typical kayaking shots — scenic photos, fishing catches, group shots at the put-in — the quality is more than acceptable. If you plan extensive underwater photography, a phone-specific hard case like the Lifeproof FRE gives better optical clarity through the camera lens cover than a universal pouch.
What size waterproof phone case do I need?
Check your phone’s screen size against the case’s maximum size specification. Standard universal pouches fit phones up to 6.9 or 7 inches — which covers all current flagship phones including the iPhone 15 Pro Max (6.7 in) and Samsung Galaxy S24 Ultra (6.8 in). If you use a bulky protective case and want to keep it attached, opt for the JOTO XL 6-Pack, which accommodates phones plus thick cases. Phone-specific hard cases require exact model matching — verify your exact phone model before ordering.
How should I carry my waterproof phone case while kayaking?
Around your neck on the included lanyard is the safest carry method for a pouch-style case. This keeps the phone accessible without requiring you to hold it, and ensures it stays with you if you capsize. A chest PFD pocket is a good secondary option for calmer water. Avoid pocket carry in shorts or pants — the phone can fall out during a wet exit or re-entry. For hard-shell cases on a phone you want to keep in your hand or mount to the kayak, a wrist leash provides security without restricting your paddle stroke.
Final Thoughts
A waterproof phone case is the most valuable $10 you will spend on your kayak kit — and if you wait until your phone hits the water to buy one, you have already spent much more than that on a replacement. The JOTO Universal Waterproof Pouch is our top pick for its combination of proven reliability, floating design, universal compatibility, and price that makes the buying decision a non-issue. For paddlers who want lifetime-guaranteed marine-grade protection, the Pelican Marine Waterproof Pouch is worth the step up to $29.99.
Whatever you choose, prioritize floating capability and get in the habit of keeping the lanyard around your neck when you are on the water. The five seconds it takes to loop that lanyard over your head before you launch is a habit that could save your phone — and in a remote location, your ability to call for help.
Also check out our guide to best dry bags for kayaking for protecting your larger gear — cameras, wallets, first aid kits — on the water.
The 7 Best Kayak Roof Racks for 2026
Kayak Gear Review Hub may earn a commission from qualifying purchases made through links on this page. This does not affect our editorial independence or product rankings.
The best kayak roof rack for most paddlers is the Malone Downloader Folding J-Style Kayak Carrier — the most trusted name in kayak transport with 666 verified reviews at 4.6 stars, a folding design that reduces highway drag, and everything you need right out of the box. If your vehicle doesn’t have crossbars, the HEYTRIP Universal Soft Roof Rack Pads mount to any roof rail with no hardware and cost under $60. We evaluated 11 options across J-style, saddle, and foam-based systems to find the best roof racks for solo paddlers, touring kayakers, and anyone who just needs to get their boat from the driveway to the water without a disaster.
Key Takeaways
- Best Overall: Malone Downloader — the most trusted brand, best review profile, includes everything
- Best for Vehicles Without Crossbars: HEYTRIP Soft Roof Rack Pads — no hardware needed, under $60
- Best for Composite/Touring Kayaks: Malone SeaWing Saddle Style — V-cradles protect expensive hulls
- Best Budget J-Bar: Heavy Duty J-Bar Kayak Rack — 2,062 reviews, complete set with straps, under $75
- Best Premium Pick: Thule Hull-a-Port XTR — pre-assembled, lockable, aluminum, lifetime warranty
- Best Mid-Range Aluminum: Aluminum 3-in-1 Kayak Rack — lighter than steel, under $90
- Best Foam Block Option: attwood Car-Top Kayak Carrier Kit — from a real marine brand, under $40
1. Malone Downloader Folding J-Style Kayak Carrier — Best Overall
Price: $$ | Buy from: Amazon
The Malone Downloader Folding J-Style Kayak Carrier is our top pick for most kayakers — and it’s not a close call. Malone has been the go-to brand for kayak transport gear among serious paddlers for years, and the Downloader is their flagship J-style rack. It earns that position the hard way: 666 verified Amazon reviews at 4.6 stars, which is one of the strongest review profiles in the kayak rack category.
The folding design is genuinely useful. When the rack is empty, it folds flat against the crossbar, cutting wind resistance significantly on the highway. You’ll notice it on longer drives — less wind noise, less fuel drain, and no rattling from an empty metal arm battering against the bar. When you’re ready to load, it snaps open, you set the kayak in the J position, run the cam straps, clip the bow and stern lines included in the box, and you’re done. Everything needed is in the package — hardware, tie-downs, the works.
What separates the Malone from the generic J-bars is the brand support and build quality. Malone has been in this space long enough that their mounting hardware fits virtually every crossbar system on the market, and if you have a problem, there are actual customer service contacts and replacement parts available. That’s not something you can say about the no-name steel racks that flood the Amazon listings.
If there’s a weakness, it’s the price. At around $170, the Downloader is a real investment compared to the budget alternatives. But for paddlers who carry their kayak every weekend, a rack that lasts five years rather than two is actually the better value.
Key Specifications
- Style: Folding J-style
- Fits: Kayaks up to 35 inches wide
- Construction: Steel with rust-resistant coating
- Includes: Bow and stern tie-down lines, mounting hardware
- Price Range: $$
2. HEYTRIP Universal Soft Roof Rack Pads — Best for Vehicles Without Crossbars
Price: $ | Buy from: Amazon
The HEYTRIP Universal Soft Roof Rack Pads solve a problem that any J-bar or saddle rack can’t: what do you do when your car doesn’t have crossbars? Whether you’re renting a vehicle, driving a car with bare roof rails, or just don’t want to commit to a full crossbar system, soft pads are the answer — and HEYTRIP’s kit is the best-reviewed option in the category, with 1,278 ratings at 4.4 stars.
The setup is simple. You strap two thick EVA foam pads across your roof using the vehicle’s doors. The pads protect your roof’s finish and the kayak’s hull. You set the kayak on top, then run the included 15-foot tie-down straps through the vehicle interior and out the windows on both sides. Tighten them down and add your bow and stern lines, and you’re ready to drive.
The biggest advantage is portability. The whole kit rolls up into the included storage bag — you can stash it in a gear bag, bring it on a rental car trip, or lend it to a friend without handing over your entire roof rack setup. If you paddle a few times a year or you’re testing out kayaking before investing in a full system, soft pads are by far the most sensible starting point.
That said, soft pads have real limits. They’re less secure than mechanical J-bar or saddle systems, especially at sustained highway speeds. Keep it at or below 65 mph, check the straps before every drive, and use bow and stern lines without exception. This isn’t the setup for a six-hour highway trip at 80 mph — it’s for getting to the lake 30 minutes away.
Key Specifications
- Style: Soft foam pads
- Crossbars Required: No
- Foam: Thick EVA with anti-slip base
- Straps: 15ft heavy-duty tie-downs included
- Extras: Includes storage bag
- Price Range: $
3. Malone SeaWing Saddle Style Kayak Carrier — Best for Composite and Touring Kayaks
Price: $$ | Buy from: Amazon
If you’re paddling a fiberglass, Kevlar, or composite kayak, the Malone SeaWing Saddle Style Kayak Carrier is worth the upgrade over a standard J-bar. Here’s why: J-style racks hold the kayak on its side, concentrating the boat’s weight on a narrow strip of hull along one rail. That’s fine for a rotationally molded plastic kayak that can take some flex. It’s not ideal for a $3,000 composite touring kayak where any deformation of the hull is a problem.
The SeaWing uses V-shaped saddle cradles that let the kayak rest upright in a natural position, distributing weight evenly along the hull’s keel and lower sides. There are no pressure points, no asymmetric loading, and no risk of deforming a composite hull over repeated trips. The 70-pound weight capacity means it handles most tandem kayaks as well as any single.
Malone’s Jawz universal mounting system is a real quality-of-life feature. It clamps onto round, square, or aero crossbars without tools — you hand-tighten two bolts and it’s locked in. On a cold morning at the put-in, not fumbling with an Allen wrench matters. The no-tool design also makes swapping between vehicles straightforward if you shuttle kayaks between different cars.
The tradeoff vs a J-bar is roof real estate. Saddle racks hold the kayak flat on top, which takes up more roof width than the side-load J position. If you’re running two kayaks on a single vehicle, two saddle setups require a wider crossbar span than two J-bars. For single-kayak paddlers with a serious boat, it’s the right choice every time.
Key Specifications
- Style: Saddle / V-cradle
- Weight Capacity: 70 lbs
- Mounting: Jawz no-tool universal system
- Construction: Nylon with corrosion-resistant hardware
- Includes: Bow and stern tie-down lines
- Price Range: $$
4. Heavy Duty J-Bar Kayak Roof Rack with 4 Ratchet Straps — Best Budget J-Bar
Price: $ | Buy from: Amazon
The Heavy Duty J-Bar Kayak Roof Rack doesn’t have a famous brand name behind it, but it has something that speaks louder: 2,062 Amazon reviews. That’s the highest review count among J-style racks in this category, and a 4.3-star average across that volume of purchases means a lot of paddlers have put their boats on the highway on this rack and driven home satisfied.
The value equation is straightforward. You get two pairs of J-bars — a complete setup for two kayaks — plus four ratchet tie-down straps, all for under $75. Compare that to the Malone Downloader at $170 for a single pair, and you understand who this is for: paddlers who kayak a handful of times per season and don’t want to spend more on the rack than they might spend on the paddle.
Steel construction is heavier than aluminum, which means slightly more wind resistance when empty. It also means that if there’s a scratch in the coating, rust can start. Keep an eye on contact points with the crossbar after wet trips and you’ll get years out of this rack. The arm width is adjustable, which covers most kayak beam widths without problem.
The honest caveat is that there’s no manufacturer support to speak of. If a piece fails or a mounting bolt strips out, you’re replacing the whole thing. For occasional paddlers, that’s an acceptable risk at this price point. For paddlers who are on the water every weekend, the Malone’s build quality is worth the investment.
Key Specifications
- Style: J-style
- Includes: 2 pairs + 4 ratchet straps
- Construction: Heavy duty steel
- Mounting: Universal crossbar fit
- Review Count: 2,062 reviews
- Price Range: $
5. Thule Hull-a-Port XTR Kayak J-Style Roof Rack — Best Premium Pick
Price: $$$ | Buy from: Amazon
The Thule Hull-a-Port XTR is the right answer when you want the best and price isn’t the primary filter. Thule is the global benchmark for roof rack systems — their crossbars and load carriers are standard equipment on premium vehicles from BMW to Subaru, and their kayak racks carry that same engineering quality.
The Hull-a-Port XTR comes pre-assembled. Unbox it, mount it to your crossbar, and it’s ready to load. There’s no step where you’re on the driveway reading a manual and sorting through a bag of hardware. For a car that lives at the trailhead or a paddler who loads in the dark at 5 a.m., pre-assembled matters. The fold-flat design means when you’re not carrying a kayak, it drops completely flat — clean profile, minimal drag.
The integrated lock barrel is a genuine differentiator in this category. No other J-bar rack at this price point has any theft deterrent. The lock core is sold separately (Thule One-Key system), which is an extra cost, but the option exists — which it doesn’t on Malone or any of the generic racks. For paddlers who leave their rack on the car at work or overnight, that matters.
At $279, this is a serious commitment. But Thule backs aluminum components with a limited lifetime warranty, and these racks are built to stay on the car for the long haul. If you’re the kind of paddler who buys once and buys right, the Hull-a-Port XTR earns it.
Key Specifications
- Style: Folding J-style
- Capacity: Up to 2 kayaks
- Construction: Aluminum
- Features: Pre-assembled, folds flat, lockable (lock core sold separately)
- Warranty: Limited lifetime on aluminum components
- Price Range: $$$
6. Aluminum 3-in-1 Kayak Roof Rack — Best Mid-Range Aluminum Option
Price: $ | Buy from: Amazon
The Aluminum 3-in-1 Kayak Roof Rack occupies a real gap in the market: aluminum construction without Thule or Malone pricing. At under $90, you get a lighter rack than the budget steel options, with 1,263 reviews at 4.3 stars backing up the quality claims.
Aluminum matters for two reasons. Weight is the obvious one — a lighter rack means slightly less weight at the top of your vehicle, better fuel economy on long hauls, and easier installation if you’re putting it on and taking it off seasonally. The less obvious advantage is corrosion resistance. Steel racks that lose their coating rust; aluminum oxidizes but doesn’t rust through. For paddlers who live near saltwater or don’t always have time to dry off the rack after a wet trip, aluminum is a longer-term investment.
The 3-in-1 adjustable design is useful. The arm angle adjusts between J-position, angled, and near-flat configurations, which means you can adapt it for different kayak widths or even use it for a SUP or surfboard in a different position. Universal crossbar mounting covers most bar profiles. The foldable design reduces profile when empty.
There are no straps included, which is a real gap at this price — budget and mid-range alternatives from generic brands tend to include them. Add a pair of cam straps to your order and you’re still well under $100 total. If you want aluminum at a fair price and can overlook the missing straps, this is the gap-filler between generic steel and premium branded.
Key Specifications
- Style: J-style / adjustable multi-position
- Construction: Aluminum
- Folding: Yes
- Straps Included: No (purchase separately)
- Review Count: 1,263 reviews at 4.3 stars
- Price Range: $
7. attwood Universal Car-Top Kayak Carrier Kit with Foam Blocks — Best Budget Foam Block Option
Price: $ | Buy from: Amazon
The attwood Universal Car-Top Kayak Carrier Kit rounds out the list as the cheapest viable way to get a kayak on a car. At $37, it’s the entry point — and unlike a lot of cheap foam kits, it comes from attwood, a legitimate marine accessories brand that’s been making boat hardware since the 1930s. That brand heritage doesn’t guarantee anything, but it’s a step above truly generic foam with no accountability behind it.
The kit is exactly what it sounds like: shaped foam blocks that cradle the kayak on your roof, plus tie-down straps to secure it. No crossbars required. You strap the foam to your roof, set the kayak in, run straps through the car, and drive. It’s the simplest possible transport solution, and for short trips to a nearby lake, it works.
The limitations are real and worth stating plainly. Foam blocks don’t grip crossbars — they just sit between your roof and the hull. If a strap loosens on the highway, there’s nothing mechanical holding the kayak in place. Keep speeds under 55 mph if you’re doing any highway driving, always use bow and stern lines, check the straps every stop, and don’t use this system for long trips.
If you paddle twice a summer and the put-in is 20 minutes away, this does the job. If you paddle every weekend, invest in a J-bar or soft pad system that’s more secure and will outlast the foam.
Key Specifications
- Style: Foam block
- Brand: attwood (established marine accessories brand)
- Crossbars Required: No
- Includes: Foam blocks + tie-down straps
- Review Count: 1,459 reviews at 4.2 stars
- Price Range: $
Kayak Roof Rack Buying Guide
J-Style vs Saddle vs Foam: Which Rack Type Is Right for You
The three main rack styles each serve a different paddler profile.
J-style racks (J-bars) are the most popular by far. They hold the kayak on its side at roughly a 45-degree angle, like the curve of the letter J. This positions the kayak efficiently — it takes up minimal roof width, which means you can carry two kayaks side by side on one vehicle. J-bars work well for polyethylene (plastic) kayaks, which make up the vast majority of recreational boats. The Malone Downloader and the budget J-bar options in this list are all J-style.
Saddle-style racks hold the kayak upright in V-shaped cradles, letting it rest as it would in the water. The hull sits evenly distributed across padded contact points rather than balanced on one edge. This is the right choice for fiberglass, Kevlar, or composite kayaks where hull flex and pressure points are a concern. The Malone SeaWing is the standout saddle option on this list.
Soft pads and foam blocks skip the mechanical mounting entirely. They’re the solution for vehicles without crossbars, for occasional paddlers, or for anyone who needs the cheapest viable transport method. Less secure, requires care with speed and strap monitoring, but genuinely useful for the right use case.
Do You Need Crossbars First?
J-style and saddle racks require crossbars — horizontal bars that span your vehicle’s roof, running side to side. Most modern SUVs and wagons come with roof rails (the bars that run front to back), but not all have factory crossbars. Before ordering any J-bar or saddle rack, check whether your vehicle has crossbars that span the roof from side to side.
If you don’t have crossbars, your options are: (1) buy a crossbar system first (Thule, Yakima, or Malone all make universal crossbar kits), then add a J-bar or saddle rack; or (2) start with soft pads or foam blocks that mount directly to the roof. For paddlers who plan to transport kayaks regularly, investing in a proper crossbar system plus a quality rack is the right long-term play.
Weight Capacity: How Much Do You Actually Need
Most recreational kayaks weigh between 35 and 65 pounds. Sit-on-top fishing kayaks tend to run heavier — some pedal drive models push 80 to 100 pounds. Tandem kayaks can reach 65 to 80 pounds for plastic versions.
The Malone SeaWing’s 70-pound capacity handles all recreational single kayaks and most tandems. For heavy fishing kayaks or fully loaded tandem boats, check the specific weight listed for your kayak and compare it to the rack’s rated capacity, then add a 20% safety buffer. If your kayak is 70 pounds, you want a rack rated for at least 84 pounds.
Most J-bar racks don’t publish a specific weight capacity — they’re designed for standard recreational kayaks and are adequate for anything under 70 pounds. If you’re regularly transporting very heavy boats, the Malone SeaWing’s explicit 70-pound rating is worth paying attention to.
Protecting Your Kayak Hull During Transport
The most common transport damage isn’t from accidents — it’s from straps overtightened over many trips, gradually deforming a plastic hull. This is called “oil canning,” and it’s the most common repair issue for used plastic kayaks.
To prevent it: use cam straps (not ratchet straps) for the main body of the kayak, tighten them snug but not cranked down, and add padding at any contact point where there’s a hard edge. Bow and stern lines should be taut but not under high tension — they’re there to prevent the nose from lifting, not to haul the boat down.
Saddle-style racks reduce hull pressure by distributing the load across the full hull width. If you have an expensive composite kayak, the Malone SeaWing’s cradle design is worth the extra cost over a J-bar specifically because it eliminates point loading.
Speed, Security, and the Case for Quality Hardware
Every kayak rack manufacturer publishes a maximum speed recommendation, and they exist for a reason. At 70+ mph, the aerodynamic forces on a rooftop kayak are significant — the bow acts like a wing and wants to lift, while the stern drags. Bow and stern lines counteract this by anchoring both ends of the kayak independently from the main straps.
Always use bow and stern lines. Many states actually require them legally, and they’re your safety net if a main strap loosens. The Malone Downloader and SeaWing both include them. If your rack doesn’t, buy a set separately before your first trip.
For racks themselves, quality hardware matters at highway speeds. The Thule and Malone racks use tested mounting systems designed to hold under load. Generic steel racks can work fine for years — but inspect the mounting hardware before every highway trip, especially after winter storage. A mount that loosened over the winter is not something you want to discover at 65 mph.
Frequently Asked Questions
What is the best kayak roof rack?
The best kayak roof rack for most paddlers is the Malone Downloader Folding J-Style Kayak Carrier. It comes from the most respected brand in kayak transport gear, has 666 reviews at 4.6 stars — the strongest review profile in the category — and ships with all the hardware and tie-down lines you need. For vehicles without crossbars, the HEYTRIP Universal Soft Roof Rack Pads are the best no-hardware solution at under $60.
Can I transport a kayak without crossbars?
Yes. Soft roof rack pads like the HEYTRIP mount directly to your roof rails or bare roof and use long tie-down straps to secure the kayak. Foam block kits like the attwood Carrier Kit also work without crossbars. These systems are less secure than J-bar or saddle racks, so keep speeds at or below 60 mph, check straps before every drive, and always use bow and stern lines anchored to solid attachment points on the vehicle.
What is a J-style kayak rack?
A J-style kayak rack holds the kayak on its side in a J-shaped cradle — the boat leans at roughly a 45-degree angle rather than lying flat on the roof. This uses less roof width and is the standard loading style for recreational kayaks. It also makes it easier to load solo: you tilt the kayak up onto one side and slide it into position rather than lifting it fully overhead. Malone, Thule, and most generic brands make J-style racks.
What is the difference between J-style and saddle-style kayak racks?
J-style racks hold the kayak on its side, which uses less roof width and works well for plastic kayaks. Saddle-style racks hold the kayak upright in V-shaped cradles, distributing the hull’s weight evenly across padded contact points. Saddle style is the preferred choice for fiberglass and composite kayaks where concentrated hull pressure over time can cause deformation. If you have a plastic recreational kayak, either style works. If you have an expensive touring or composite kayak, go with saddle style.
How fast can I drive with a kayak on my roof?
Most manufacturers recommend at or below 65 mph with a properly secured kayak on a quality rack. With soft pads or foam blocks, keep it at or below 55 mph. Always use bow and stern lines — these prevent the front of the kayak from lifting at speed, which can cause progressive strap failure. Check straps at every gas stop on a highway trip. If straps look loose, pull over and retighten before continuing.
Do I need bow and stern tie-down lines?
Yes. Bow and stern lines anchor the front and back of the kayak independently from the main crossbar straps. At highway speeds, aerodynamic lift on the bow can progressively loosen main straps — the bow line prevents this entirely. Many states legally require them when transporting boats. The Malone Downloader and SeaWing both include them. If your rack doesn’t come with them, buy a set of cam straps and anchor them to solid tow hooks or bumper brackets front and rear.
Final Thoughts
Getting your kayak transport setup right is a one-time problem. Buy the right rack for your vehicle and your boat, learn to strap it correctly, and you’ll load and unload in under five minutes for years. The Malone Downloader is the right call for most paddlers — trusted brand, best review profile in the category, includes everything, and the folding design means you actually want to leave it on the car between trips. If your vehicle doesn’t have crossbars, start with the HEYTRIP Soft Roof Rack Pads and you’re on the water without a major hardware investment.
Whatever you choose, use bow and stern lines. Always. A kayak on the highway is a serious road hazard if it comes loose — treat it accordingly and it never will.
If you have questions about choosing a rack for your specific vehicle or kayak, leave a comment below. Also check out our guide to the best kayak carts for getting your boat from car to water once you’ve arrived, and the best dry bags for kayaking to keep your gear protected on the water.
The 7 Best Kayak Gloves for 2026
As an Amazon Associate, Kayak Gear Review Hub earns from qualifying purchases. This does not affect our editorial independence or product rankings.
The best kayak gloves for most paddlers are the Glacier Glove Kenai Full Finger Gloves, which combine 2mm neoprene construction, a seam-free Amara palm that eliminates blisters, and over 1,800 verified reviews confirming long-term reliability. For touring and sea kayaking specifically, the NRS Maverick Gloves are the brand standard — purpose-built for paddling with pre-curved fingers and full XS-XL sizing. For cold-water conditions, pogies beat gloves on warmth, and the Level Six Emperor Pogies are the top pick in that category. We evaluated 10 options across warm-weather fingerless gloves, 3-season neoprene, fully waterproof membrane gloves, and cold-water pogies to find the best kayak hand protection for every paddling style and budget.
Raw hands after a long paddle aren’t a badge of honor — they’re a sign you forgot your gloves. The paddle shaft creates constant friction against the same points on your palm, and it takes surprisingly little time for that friction to turn into blisters. Experienced kayakers don’t tough it out; they buy a decent pair of gloves and spend their energy paddling instead of managing pain.
The challenge is that “kayak gloves” covers a wide range of gear — from thin fingerless summer gloves to neoprene cold-water mitts to pogies (a completely different concept that most beginners haven’t heard of). Getting the right type for your conditions matters more than getting the most expensive pair.
1. Glacier Glove Kenai Full Finger Gloves — Best Overall
The Glacier Glove Kenai Full Finger Gloves earn the top spot through a combination of construction quality, proven reliability, and broad seasonal usefulness. With over 1,800 reviews averaging 4.4 stars, these gloves have one of the strongest track records in the paddling category.
The standout feature is the seam-free palm construction. Most paddling gloves have stitched seams running across the palm — exactly where the paddle shaft contacts your hand on every stroke. Over the course of a multi-hour paddle, those seams are a blistering guarantee. The Kenai eliminates this problem with a seamless palm that distributes pressure evenly. It’s the kind of design detail that separates gloves designed by people who actually paddle from gloves designed by people who just sell gear.
The 2mm neoprene construction makes these genuinely waterproof — they’ll keep hands warm and dry in spray and rain, and they insulate even when fully wet. That 2mm thickness hits the sweet spot for 3-season paddling in water temperatures between 50-65°F. They’re not thick enough for winter ice-water conditions, but for the vast majority of recreational kayaking from spring through fall, they’re exactly right. The Amara palm reinforcement adds durability at the high-wear grip points without sacrificing feel for the paddle shaft.
The Glacier Glove brand started in fishing, which explains why these crossover so well into kayak fishing — they understand wet-hand grip in a way that general outdoor glove brands often don’t.
One limitation: sizing only goes S-XL, which may leave very small or very large hands without a good fit. If you need XS or XXL, look at the NRS Maverick or DYWLQ options instead.
Key Specifications
- Material: 2mm neoprene, Amara palm reinforcement
- Type: Full-finger
- Warmth: 3-season (50-65°F water temps)
- Waterproof: Yes (neoprene construction)
- Sizes: S-XL
- Price Range: $$
2. NRS Maverick Gloves — Best for Touring and Sea Kayaking
When paddling-specific brands matter, NRS is the name that comes up first. The NRS Maverick Gloves are the benchmark touring and sea kayak glove — designed from the ground up for the specific demands of extended paddling, not adapted from a cycling or hiking glove.
The pre-curved finger design is what makes the Maverick stand out for long-distance paddling. Your hand naturally curls around a paddle shaft when gripping — most gloves are cut flat and force your fingers to fight against the material to maintain a proper grip. Pre-curved gloves follow the natural shape of your gripping hand, which dramatically reduces fatigue over the course of a 3-4 hour paddle. If you’ve ever finished a long tour with aching hands that felt like they’d been clenched into fists all day, poorly curved gloves were likely part of the problem.
The fleece lining adds a layer of warmth without significant bulk — enough to take the edge off cool morning air or a light chop, but not so heavy that you’re sweating in the afternoon. Combined with the Amara palm reinforcement, the Maverick is a genuinely versatile 3-season glove.
The full XS-XL sizing range is a practical advantage over competitors with limited size charts. Paddling gloves need to fit precisely — too loose and they bunch at friction points, too tight and you lose circulation and dexterity. NRS gets sizing right across the full spectrum.
The honest limitation: these are not truly waterproof. In splashing and spray they perform well, but sustained submersion will soak them through. For cold-water conditions where waterproof performance is critical, look at the Sealskinz option below. For most kayak touring in 3-season conditions, the Maverick is outstanding.
Key Specifications
- Material: Amara palm, neoprene back
- Type: Full-finger
- Warmth: 3-season (cool water, moderate air temps)
- Waterproof: Water-resistant (not fully waterproof)
- Sizes: XS-XL
- Price Range: $$
3. NRS Raku Gloves — Best Fingerless Gloves
If you kayak fish, shoot photos from the cockpit, or paddle in warm weather where full-finger gloves feel suffocating, the NRS Raku Gloves are your best option. These are the standard warm-weather paddling glove from the dominant brand in the category.
The fingerless design protects the palm — the part that actually contacts the paddle shaft and blisters — while leaving fingertips free for the tasks that require sensitivity. For fishing, this means you can tie knots, remove hooks, and handle line without taking your gloves off. For photographers, you can work camera controls. For general summer paddling, you simply don’t overheat.
NRS uses Amara palm reinforcement on the Raku, same as the Maverick, which means the high-wear area gets proper abrasion resistance. A thin lycra back keeps the glove cool and allows sweat to escape. The velcro wrist closure keeps the gloves from sliding around on wet hands — a problem that fingerless gloves without wrist straps develop quickly.
These are strictly a warm-weather glove. There’s no insulation, no water resistance — just palm protection and grip. On a 70°F summer day on flat water, they’re exactly right. In anything below 60°F air temperature, or in cold-water conditions, you need something more substantial.
The Raku is also lightweight enough to fit in a PFD pocket without adding noticeable bulk — so you can carry them even when you don’t expect to need them and pull them out if your hands start to fatigue.
Key Specifications
- Material: Amara palm, lycra back
- Type: Fingerless (half-finger)
- Warmth: Warm weather only
- Waterproof: No
- Sizes: XS-XL
- Price Range: $
4. Level Six Emperor Pogies — Best for Cold-Water Kayaking
The Level Six Emperor Pogies work on a completely different principle than gloves, and once you understand the design, it’s hard to argue with it for cold-water paddling.
Pogies are mittens that attach to your paddle shaft rather than fitting over your hands. Your bare hands slide through an opening at the back of the pogie and grip the paddle shaft directly — no fabric between palm and shaft. The pogie then encases your hands in an insulated shell that traps body heat. The result: maximum warmth without sacrificing any paddle feel.
The physics are compelling. When your bare hands are gripping the shaft inside a neoprene shell, your body heat builds up rapidly in that enclosed space. Compare that to traditional gloves, where cold water can flush through the glove and body heat escapes through the back of the hand. For sustained cold-water kayaking, pogies consistently outperform gloves of equivalent thickness on warmth.
The Level Six Emperor uses 2mm neoprene with a fleece lining — warm enough for late fall and early spring paddling in water temperatures in the 40-55°F range. The velcro closure secures the pogie to most standard paddle shaft diameters. One-size-fits-most simplifies buying decisions.
The real limitation is that pogies only work while you’re holding the paddle. For portaging, setting up camp, or any shore-based task, your hands are exposed. Paddlers who need to move between water and land frequently often keep a pair of lightweight gloves in their PFD pocket for those moments. If your paddling is primarily on the water without frequent stops, this tradeoff is minor.
Key Specifications
- Material: 2mm neoprene, fleece lining
- Type: Pogies (paddle-mounted mitts)
- Warmth: Cold weather (water temps 40-55°F)
- Waterproof: Yes (neoprene construction)
- Sizes: One size fits most
- Price Range: $$$
5. Sealskinz Waterproof All Season Gloves — Best Fully Waterproof Gloves
If you paddle in rain — not just occasional spray, but sustained rain where you’re getting genuinely wet — the Sealskinz Waterproof All Season Gloves are the only option on this list with true waterproof certification. These use membrane technology, the same approach as Gore-Tex jackets, to create a waterproof barrier that keeps hands completely dry from the outside.
Sealskinz is a UK-based brand that specializes exclusively in waterproof gloves and socks. They’ve been doing this for decades, and the 3,240+ reviews with a 4.1-star average reflect genuine long-term reliability across a huge buyer pool. This isn’t a sport-specific glove brand, but for paddlers who need hands to stay dry in rain and splash, the waterproof membrane performance is unmatched by neoprene at similar price points.
The merino wool lining adds warmth and moisture management — merino regulates temperature well and doesn’t develop the synthetic smell that fleece linings sometimes get over time. Touchscreen-compatible fingertips work reliably on wet touchscreens, which is useful for navigating with a phone or GPS while kayaking.
The honest limitation is that these aren’t paddle-specific. The grip texture is designed for general outdoor use, not optimized for a paddle shaft. For high-output touring or whitewater, dedicated paddling gloves like the NRS Maverick or Stohlquist Headwater will give better grip performance. The Sealskinz is the right choice for touring paddlers who prioritize keeping hands dry over maximizing grip performance.
Key Specifications
- Material: Stretch nylon outer, waterproof membrane, merino wool lining
- Type: Full-finger
- Warmth: 3-season (cool to cold conditions)
- Waterproof: Yes (certified waterproof membrane)
- Sizes: XS-XL
- Price Range: $$$
6. Stohlquist Headwater Paddling Gloves — Best Grip for Whitewater
Stohlquist builds safety-focused paddling gear, and the Stohlquist Headwater Paddling Gloves reflect that orientation — these prioritize secure paddle control above everything else.
The key differentiator is the goatskin palm. Most paddling gloves use Amara, a synthetic suede that performs well but is ultimately a cost-optimized substitute. Goatskin is the real thing — it’s naturally water-resistant, conforms to your hand shape over time, and provides tactile grip that synthetic materials can’t fully replicate when wet. Whitewater kayakers and high-output sea kayakers who are handling boats in demanding conditions will feel the difference.
Stohlquist is a trusted name among paddling instructors and serious kayakers for the same reason NRS is — they make gear specifically for the demands of paddling, not outdoor recreation in general. The neoprene back panel provides water resistance while keeping the glove flexible. The pre-curved construction reduces grip fatigue over long outings.
The main drawback with goatskin is break-in time. Unlike synthetic Amara, which is comfortable from the first paddle, goatskin needs a few sessions to soften and conform to your hand shape. Out of the box, they can feel a bit stiff. Paddlers who invest the break-in time are consistently rewarded — but if you need immediate comfort, the NRS Maverick is a better starting point.
Key Specifications
- Material: Goatskin palm, neoprene back
- Type: Full-finger
- Warmth: 3-season
- Waterproof: Water-resistant (goatskin + neoprene)
- Sizes: XS-XL
- Price Range: $$
7. DYWLQ Kayak Paddling Gloves — Best Budget Pick
Not everyone needs to spend $35-60 on paddling gloves, especially if you’re a casual summer kayaker doing a few hours on calm water. The DYWLQ Kayak Paddling Gloves deliver the core benefit — palm protection and grip — at under $17.
DYWLQ is a straightforward Amazon brand, and these gloves are exactly what they look like: a synthetic leather palm with an anti-slip silicone pattern, a breathable mesh back, and a velcro wrist strap. There’s nothing innovative here, but the 2,100+ reviews at 4.2 stars confirm they do what they promise. The silicone anti-slip pattern on the palm works surprisingly well on wet paddle shafts — better than plain synthetic leather.
The wide size range (S-XXL) is a genuine advantage over competitors like Glacier Glove that stop at XL. Paddlers with larger hands often struggle to find gloves that fit without cutting off circulation at the wrist.
These are a warm-weather-only glove. No insulation, no neoprene, no real water resistance. They’re designed to protect the palm from blisters and improve grip in warm conditions — full stop. If you’re an occasional recreational kayaker and can’t justify $35+ on paddling gloves, the DYWLQ is a completely reasonable choice.
Key Specifications
- Material: Synthetic leather palm, mesh back
- Type: Fingerless (half-finger)
- Warmth: Warm weather only
- Waterproof: No
- Sizes: S-XXL
- Price Range: $
Best Kayak Gloves Buying Guide
Gloves vs. Pogies vs. Mitts: Which Do You Need?
The first decision isn’t which brand to buy — it’s what type of hand protection fits your paddling.
Gloves fit over your hands and work for all on-water and off-water tasks. They’re the right choice for most recreational kayakers, touring paddlers, and kayak anglers who need versatility. Full-finger gloves protect against cold, wind, and UV. Fingerless gloves focus on palm protection and grip for warm-weather conditions.
Pogies attach to the paddle shaft and let you grip bare-handed inside an insulated shell. They’re warmer than gloves of equivalent thickness because your body heat builds up in the enclosed space. Pogies are the preferred choice for cold-water and whitewater kayakers who prioritize warmth and paddle feel over versatility.
Mitts combine the hand-covering design of gloves with the warmth of a full enclosure. NRS and other paddling brands make neoprene mitts for cold-water conditions. They’re warmer than gloves but sacrifice dexterity — you can’t easily operate rigging, cameras, or fishing gear while wearing them. Mitts work best for dedicated cold-water kayaking where you’re on the water the entire time.
For most recreational kayakers, gloves are the right choice. Experienced cold-water paddlers who know they’ll be on the water for extended periods often prefer pogies.
Material Guide: Neoprene, Amara, and Waterproof Membranes
Neoprene is the standard material for paddling gloves that need to perform in cold or wet conditions. It insulates when wet, dries relatively quickly, and provides water resistance through its construction. Thickness is measured in millimeters: 2mm for 3-season use, 3-3.5mm for cold water. The tradeoff is that neoprene reduces dexterity compared to thinner materials — the thicker the neoprene, the warmer but less sensitive the glove.
Amara is a synthetic suede used for palm reinforcement in most mid-range paddling gloves. It’s durable, provides good grip when wet, and is consistently used by NRS, Stohlquist, and others. Amara is a quality synthetic — not a sign of cheap construction. Goatskin leather performs slightly better for grip and natural water resistance but requires break-in time and costs more.
Waterproof membranes (used by Sealskinz and similar brands) create a certified waterproof barrier between your hand and the outside environment. Unlike neoprene, which resists water ingress through material density, membrane gloves use a bonded layer that actively blocks water molecules while allowing some breathability. This is the most reliable approach for keeping hands completely dry in rain and sustained exposure.
Warmth Ratings: Matching Your Gloves to Water Temperature
Water temperature is the key variable — air temperature matters less than you’d think when you’re focused on paddling.
- Above 70°F water: Fingerless gloves or thin synthetic gloves are sufficient. Focus is on palm protection and grip, not warmth.
- 60-70°F water: 2mm neoprene or fleece-lined full-finger gloves are appropriate. This is the range where unprotected hands start to chill over a long paddle.
- 50-60°F water: 2mm neoprene gloves or pogies. At this temperature range, cold water splashing on unprotected hands becomes genuinely uncomfortable and can affect grip strength.
- Below 50°F water: 3-3.5mm neoprene or pogies are necessary. Cold shock risk increases significantly below 50°F, and hand strength degrades rapidly in cold immersion.
If you’re paddling in water below 60°F, you should also be wearing appropriate cold-water protection for your core (wetsuit or drysuit). Gloves are part of a complete cold-water safety system, not a standalone solution.
Full-Finger vs. Fingerless: Dexterity vs. Protection
The choice between full-finger and fingerless comes down to what you’re doing on the water.
Full-finger gloves protect the entire hand, provide warmth, and work in all conditions. They reduce finger sensitivity, which matters most for kayak anglers tying knots and handling line, and photographers working camera controls. For cold-water paddling, full-finger is essential.
Fingerless gloves maximize dexterity at the cost of fingertip protection and warmth. They’re ideal for warm-weather fishing kayakers, photographers, and anyone doing technical work on the water that requires fingertip sensitivity. In cool or cold conditions, exposed fingertips cool quickly and become a liability.
A practical approach many experienced paddlers use: keep a pair of fingerless gloves for warm days and have a pair of full-finger neoprene gloves for cooler conditions. Both options are affordable enough that owning two pairs for different seasons makes sense.
Fit and Sizing: How Kayak Gloves Should Feel
Proper fit matters more for paddling gloves than for most other outdoor gloves because poor fit translates directly into blisters and hand fatigue.
The palm should be smooth with no bunching when your hand is flat. Finger length should reach the tip of each finger — too short and the seams at the fingertips become friction points. The wrist closure should be snug enough to keep the glove from sliding, but not tight enough to restrict circulation.
For neoprene gloves, size up half a size if you’re between sizes — neoprene compresses slightly when wet and conforms to your hand, so a slightly larger size in dry conditions will fit properly on the water.
For leather or Amara gloves, size to fit — these materials stretch with use, so an accurate fit dry will stay accurate over time.
For fingerless gloves, priority is the palm fit since that’s where the material matters. Fingerless designs are more forgiving on exact finger length.
Always check the specific brand’s size chart — there’s no universal standard for paddling glove sizing, and XS/S/M/L/XL varies significantly between NRS, Glacier Glove, and Sealskinz.
Frequently Asked Questions
What are the best kayak gloves for 2026?
The best kayak gloves for most paddlers in 2026 are the Glacier Glove Kenai Full Finger Gloves. They offer 2mm neoprene construction, a seam-free Amara palm that eliminates blisters, and over 1,800 reviews confirming long-term reliability. For touring and sea kayaking specifically, the NRS Maverick Gloves are the standard choice from the most trusted paddling brand. For warm weather, the NRS Raku fingerless gloves give maximum dexterity. Budget paddlers should consider the DYWLQ Kayak Paddling Gloves at under $17.
Do you need gloves for kayaking?
Gloves aren’t required for kayaking, but for paddles longer than an hour they make a significant difference. The friction between the paddle shaft and palm is constant and cumulative — blisters are the predictable result of unprotected hands over time. Gloves also add warmth in cold conditions and improve grip on wet shafts. For casual warm-weather paddling under 60 minutes, bare hands are fine. For anything longer, a pair of fingerless gloves at minimum is worth the small investment.
What is the difference between kayak gloves and pogies?
Kayak gloves fit over your hands like regular gloves, with fabric between palm and paddle shaft. Pogies attach directly to the paddle shaft — your bare hands slide inside and grip the shaft with no fabric in between. Pogies offer significantly better warmth because your body heat builds up in the enclosed space around your hands. Gloves are more versatile since you can use them for on-shore tasks. Most cold-water and whitewater kayakers prefer pogies for warmth; most recreational and fishing kayakers prefer gloves for versatility.
What kayak gloves are best for cold water?
For cold-water kayaking, the Level Six Emperor Pogies are the warmest option — 2mm neoprene encloses your bare hands around the paddle shaft, trapping body heat more effectively than traditional gloves. For glove-style cold-water protection, the Sealskinz Waterproof All Season Gloves use a waterproof membrane to keep hands dry in rain and spray. NRS also makes the Cove Wetsuit Gloves with 3.5mm neoprene and glued and blindstitched seams for minimizing water flushing.
Are neoprene gloves good for kayaking?
Yes — neoprene is one of the best materials for kayaking gloves because it insulates even when wet. 2mm neoprene suits 3-season paddling in water temperatures between 50-65°F. 3mm or 3.5mm neoprene works for colder water below 50°F. The tradeoff is that thicker neoprene reduces grip sensitivity and dexterity. For warm summer paddling, synthetic or Amara-palm fingerless gloves are more comfortable. For spring, fall, and cool-water conditions, neoprene gloves are the right choice.
How should kayak gloves fit?
Kayak gloves should fit snugly with no loose material in the fingers. With your hand open, the palm should be smooth and flat with no bunching. Fingers should reach the tip of each digit with no excess material. The wrist closure should be snug but not cutting off circulation. If you’re between sizes in neoprene gloves, size up — neoprene compresses when wet. For leather or Amara gloves, size to fit since they stretch with use. Always check the brand-specific size chart since sizing varies significantly between NRS, Glacier Glove, and Sealskinz.
Final Thoughts
For 3-season kayakers who want one pair of gloves that covers most conditions, the Glacier Glove Kenai Full Finger Gloves are the best all-around choice — the seam-free palm and strong review history give them a genuine edge. Touring and sea kayakers who log serious mileage will appreciate the purpose-built construction of the NRS Maverick Gloves. And if you’re paddling in water below 55°F, give pogies a serious look — once you’ve paddled with your bare hands inside a warm neoprene shell on a cold day, going back to gloves feels like a step backward.
The right pair of gloves costs less than the blister treatment and lost paddle days that come from skipping them. It’s one of the easier gear decisions in kayaking.
Also check out our guides to the best kayak paddles and best kayak paddle leashes to round out your paddle kit.
The 7 Best Kayak Paddle Leashes for 2026
Kayak Gear Review Hub may earn a commission from qualifying purchases made through links on this page. This does not affect our editorial independence or product rankings.
The best kayak paddle leash for most paddlers in 2026 is the Seattle Sports Coiler Paddle Leash — it extends to 9 feet, includes a quick-release wrist buckle, and uses UV-resistant coiled cord that holds up season after season. With over 3,200 Amazon reviews and a price under $15, it’s the easiest recommendation we make all year. For kayak anglers who need both hands free to fish, the YakAttack PadHook is the better call — it clips to your kayak or PFD instead of your wrist. We evaluated 10 leashes across coiled, straight, and bungee designs to find the seven worth buying, whether you’re paddling a calm lake or running coastal routes.
1. Seattle Sports Coiler Paddle Leash — Best Overall
The Seattle Sports Coiler Paddle Leash is our top pick because it gets the fundamentals exactly right without charging a premium for them. At under $15, you get a coiled cord that extends to 9 feet — the longest reach in the budget category — plus a quick-release wrist buckle and UV-resistant construction. Over 3,200 Amazon reviewers have put this leash through its paces, and it consistently earns 4.5 stars. That’s the kind of review volume that tells you something genuine about a product.
The 9-foot reach matters more than most people realize. If your paddle drifts or gets pulled by current while you’re leaning over to land a fish or grab gear, you want slack in the system. A 5-foot leash yanks at your wrist. A 9-foot leash lets the paddle float out while you sort things out, then retrieve it smoothly. The UV-resistant cord is a small but important detail — regular leash cords go brittle and snap after a season in the sun if they’re not UV-stabilized.
The one genuine limitation: there’s no padded wrist cuff. On a half-day trip, that’s not an issue. If you’re doing full-day coastal paddles where the leash is on your wrist for six or eight hours, the strap can leave marks. For those situations, step up to the NRS Coiled Paddle Leash at rank 2.
Key Specifications
- Type: Coiled
- Extended Length: 9 feet
- Attachment: Adjustable wrist strap with quick-release buckle
- Material: UV-resistant coiled cord
- Weight: 2 oz
- Price Range: $
2. NRS Coiled Paddle Leash — Best Quality Build
NRS Coiled Paddle Leash has been making paddling gear for serious kayakers and whitewater paddlers for decades, and the NRS Coiled Paddle Leash shows exactly what it looks like when a dedicated paddle sports company builds a leash rather than a generic marine accessories manufacturer.
The padded wrist cuff is the standout feature. It sounds minor until you’ve worn a thin velcro strap for five hours — the NRS cuff distributes the contact pressure across a wider area and doesn’t dig in when the leash goes taut. The snap clip is stainless steel, which means it won’t corrode in saltwater and won’t develop the faint rust spots that show up on cheaper zinc clips after a season of coastal use. NRS backs it with a lifetime guarantee on materials — that’s not window dressing when you’re buying a paddling accessory from a company that plans to be around.
At 7 feet extended, the NRS is slightly shorter than the Seattle Sports at 9 feet. That’s a real tradeoff. In practice, 7 feet is more than enough for most sit-on-top kayaks — the paddle can float parallel to the hull without the leash going taut during normal paddling. Where 7 feet starts to feel short is in rough conditions where a wave pushes the paddle farther out while you’re swimming. If you paddle in open coastal water or in significant chop, the Seattle Sports’ extra 2 feet is worth something. At a 4.7 star rating across 1,450 reviews, the NRS Coiled sits at the top of the quality tier in this category.
Key Specifications
- Type: Coiled
- Extended Length: 7 feet
- Attachment: Padded wrist cuff with stainless steel snap
- Material: Coiled polyurethane
- Weight: 3 oz
- Warranty: NRS lifetime guarantee
- Price Range: $$
3. YakAttack PadHook Paddle Leash — Best for Kayak Fishing
Everything about wrist-attached leashes is designed for the wrong scenario if you’re kayak fishing. When you’re holding a rod, fighting a fish, or reaching into a cooler, the last thing you want is a paddle leash looping around your arm. The YakAttack PadHook solves this by flipping the attachment point from your wrist to your kayak — specifically to your deck rigging, hatch handles, or PFD D-ring.
YakAttack is the brand that serious kayak anglers trust for accessories, and the PadHook is exactly the product you’d expect from them: well-engineered, properly thought through, and built for the specific conditions kayak fishing creates. The bungee/coiled hybrid design extends to 8 feet and includes a quick-release clip at the kayak end. The large clip accommodates various paddle shaft diameters without slipping or rattling. It’s made in the USA.
The tradeoff with kayak-side attachment is worth understanding clearly: if you capsize and separate from your kayak, the paddle stays with the kayak, not with you. For most kayak fishing situations on lakes and protected coastal water, this is perfectly fine — you can swim back to the kayak and the paddle will be right there. In moving water, currents, or surf zones, a wrist leash is the safer choice because the paddle stays with you regardless of what happens to the kayak. If you fish from a kayak, this is the leash we’d pick. At $18.95 and a 4.6 star rating, it’s also priced right.
Key Specifications
- Type: Bungee/coiled hybrid
- Extended Length: 8 feet
- Attachment: Deck rigging or PFD D-ring (kayak-side, not wrist)
- Quick Release: Yes
- Material: Bungee cord with large diameter clip
- Origin: Made in USA
- Price Range: $$
4. NRS Quick-Release Paddle Leash — Best for Safety-Conscious Paddlers
If you paddle rivers, tidal rips, or any moving water, this is the leash to know about. The NRS Quick-Release Paddle Leash is built around a genuine quick-release buckle — the same type used on PFDs and rescue systems — that you can detach instantly with one hand even while wearing gloves.
Here’s why it matters: in whitewater or fast current, a leash that snags a submerged branch, rock, or strainer can pin you underwater. The quick-release buckle lets you ditch the leash in the same motion you’d use to ditch a PFD chest strap. That’s not a feature you ever want to need, but it’s the feature that separates this leash from everything else in the category when conditions get serious.
The leash is a straight design with nylon webbing — not coiled. It adjusts from 3 to 7 feet and attaches to a PFD D-ring rather than the wrist. Attaching to the PFD keeps the leash away from your cockpit and legs, where a coiled leash can snag during wet exits. This is the highest-rated leash in our roundup at 4.8 stars, though with fewer reviews (310) than the volume leaders — that’s consistent with a specialty product bought by paddlers who know what they want and review it carefully. NRS backs it with their lifetime guarantee. A note: many experienced whitewater kayakers deliberately paddle without a leash in technical water, arguing that the entanglement risk outweighs the benefit of keeping the paddle. If you paddle Class III or above, that’s a legitimate perspective. The NRS Quick-Release is the right compromise for paddlers who want leash security but need an emergency exit option.
Key Specifications
- Type: Straight with genuine quick-release buckle
- Extended Length: 3–7 feet (adjustable)
- Attachment: PFD D-ring
- Quick Release: Yes — one-hand operation
- Material: Nylon webbing
- Warranty: NRS lifetime guarantee
- Price Range: $$
5. Salamander Paddle Leash — Best Anti-Tangle Design
There’s a specific annoyance that every paddler who’s owned a coiled leash has experienced: the paddle rotates during your stroke, the leash wraps around the shaft, and now you have a three-inch effective leash instead of a six-foot one. The Salamander Paddle Leash solves this with a swivel clip at the paddle end that rotates freely as the shaft turns, letting the paddle spin as much as it wants without the leash winding up.
It’s a small design detail that makes a genuine difference in day-to-day use. The leash itself is 6 feet extended — shorter than most of our picks, which works in its favor for sit-inside kayaks where the paddle shaft stays closer to the hull. If you paddle a sea kayak or a sit-inside touring boat, the 6-foot length means the leash goes taut only in an actual emergency, not constantly during normal blade entry and exit.
The wrist attachment is velcro with no quick-release buckle — that’s the main limitation here. Velcro is comfortable and simple, but it’s not as fast to ditch as a buckle if you need to get free in a hurry. At 1.8 oz, this is the lightest leash in our roundup. Salamander has been making paddle sports accessories for years and the quality shows — the materials are solid, the swivel moves freely without feeling sloppy, and at $14.95 it’s competitively priced for the problem it solves.
Key Specifications
- Type: Coiled with swivel clip
- Extended Length: 6 feet
- Attachment: Velcro wrist strap
- Quick Release: No
- Material: Coiled cord with swivel paddle clip
- Weight: 1.8 oz
- Price Range: $
6. Attwood Kayak Paddle Leash — Best Budget Pick
At under $10, the Attwood Kayak Paddle Leash does exactly one thing — keeps your paddle attached to your wrist — and it does that well. Attwood Marine has been making boating accessories since the 1950s and has the Amazon review volume to show for it: over 2,100 reviews on a product this simple is a meaningful signal.
The coiled leash extends to 5 feet. That’s the shortest reach in our roundup, which means it’s most comfortable and least intrusive on calm, flatwater paddles where your paddle stays close. On a protected lake or a slow river with no real hazard, 5 feet is plenty. You notice the shorter reach when you’re leaning away from the paddle, paddling a wider sit-on-top hull, or if you capsize and need slack in the system.
There’s no padded cuff, no quick-release buckle, and no fancy swivel clip — just a coiled cord with a snap hook at one end and an adjustable wrist strap at the other. For a once-a-month recreational paddler who wants basic paddle security without spending much, that’s fine. For anyone paddling regularly or in anything other than calm water, step up to one of the higher-ranked options.
Key Specifications
- Type: Coiled
- Extended Length: 5 feet
- Attachment: Wrist clip
- Quick Release: No
- Material: Coiled cord
- Weight: 1.5 oz
- Price Range: $
7. Pelican Sport Bungee Paddle Leash — Best for Beginners
The Pelican Sport Bungee Paddle Leash takes a different approach: instead of a coiled cord attached to the wrist, it uses bungee elastic and clips to your kayak’s bow toggle, handle, or deck rigging. The bungee material stretches more gently and recoils more smoothly than a coiled plastic cord, which makes it less intimidating for new paddlers and kids.
Pelican Sport is one of the best-known names in recreational kayaking — many beginners own a Pelican kayak before they know any other paddle brand, and having a matching leash from the same brand is an easy purchase decision. The leash clips to the kayak at both ends (paddle shaft and boat), extends to 8 feet with the bungee stretch, and is available at major retailers where Pelican kayaks are sold.
The limitation is important to understand: because this leash attaches to the kayak and not your wrist, it doesn’t protect you if you capsize and drift away from the boat. For a beginner paddling a calm lake with someone else around, that scenario is unlikely. For solo paddlers or anyone on open water, a wrist-attached leash is the safer choice. Pelican’s design is best understood as a tether to keep the paddle from drifting when you set it across the hull, not as a safety system for capsize scenarios. At $13.49 and a 4.4 star rating, it’s well-priced for what it does.
Key Specifications
- Type: Bungee
- Extended Length: 8 feet
- Attachment: Kayak bow toggle/handle (not wrist)
- Quick Release: No
- Material: Bungee cord with snap clips
- Weight: 2 oz
- Price Range: $
Kayak Paddle Leash Buying Guide
Coiled vs. Straight vs. Bungee: Which Leash Design Is Right for You?
Coiled leashes are the right choice for most kayakers. They contract to a few inches when the paddle is in your hands, staying completely out of the way, and extend smoothly when the paddle drifts. The coiled cord doesn’t loop around your legs, cockpit, or gear the way a loose straight leash can. Almost every recreational paddle leash sold on Amazon is coiled for this reason — the design has proven itself over decades of use.
Straight leashes with nylon webbing (like the NRS Quick-Release) are designed for safety-critical applications. The advantage is simple: a quick-release buckle is much easier to integrate into flat webbing than into coiled cord, and quick-release is what you need in moving water. If you paddle rivers or tidal currents, the straight design isn’t a compromise — it’s the right tool.
Bungee leashes are the gentlest option. The elastic stretch absorbs shock more smoothly than coil, which reduces wrist fatigue and makes the leash feel less aggressive when it goes taut. The tradeoff is that bungee leashes typically attach to the kayak rather than the wrist, which changes the protection profile significantly. Bungee works well for calm flatwater where the leash is more “parking brake” than safety gear.
Wrist Attachment vs. Kayak Attachment: Know the Difference
This is the most important decision in the category, and most buyers don’t think about it until they’ve already chosen.
A wrist-attached leash keeps the paddle with you through a capsize — even if you’re 20 feet from your kayak, the paddle is right there. This is the right choice for any open water, ocean, or coastal paddling where separating from the kayak is a real possibility.
A kayak-attached leash (YakAttack PadHook, Pelican Bungee) keeps both hands completely free, which is exactly what kayak anglers need. But if you separate from the kayak, the paddle stays with the boat, not with you. On a protected lake with a partner nearby, this is usually fine. In surf, tidal rips, or any situation where you might drift apart from your kayak, it’s a genuine hazard. Neither design is universally better — they solve different problems. Know which scenario describes your paddling before you buy.
Length Matters: How Far Should Your Paddle Leash Extend?
Paddle leash length directly affects two things: how often the leash goes taut during normal paddling, and how much slack you have in an emergency.
For sit-on-top kayaks, which have wider hulls and a higher seating position, the paddle shaft travels farther during each stroke. A 7–9 foot leash gives enough slack that the cord doesn’t pull at your wrist on every stroke. For sit-inside kayaks with narrower hulls and a lower seating position, 6–7 feet is typically sufficient.
If you mostly paddle solo in open water — lakes, bays, or coastal routes — err toward the longer end of the range. The extra slack means you have time to right yourself after a capsize before the leash runs out. If you paddle rivers or narrow channels where a long trailing leash could snag on obstructions, shorter is safer. The sweet spot for most recreational paddlers is 7–9 feet. Leashes shorter than 6 feet will occasionally go taut during normal paddling, which is annoying at best and a wrist strain risk at worst.
Quick-Release Buckles: When They’re a Safety Must-Have
Most paddle leashes don’t have genuine quick-release buckles. Velcro wrist straps release quickly enough in most situations. But in moving water — rivers, rapids, tidal currents — “quickly enough” can mean the difference between swimming free and being pinned.
The scenario: you capsize in fast water, the leash catches on a submerged rock or branch, and suddenly you’re being held underwater by your wrist. With a velcro strap, you need to get both hands to the wrist, peel the velcro against the water pressure, and release it while fighting current. With a true quick-release buckle (like the NRS Quick-Release), one sharp pull on the correct tab and you’re free.
If you paddle Class II or above, tidal races, or any fast-moving water, the NRS Quick-Release is worth the higher price. For calm water paddlers, the quick-release feature is nice to have but not critical.
Durability and Materials: What to Look For
Paddle leashes live outdoors in UV exposure, saltwater, and temperature extremes. Three materials concerns matter.
UV resistance is the most overlooked factor. Standard coiled cord (often PVC or polypropylene) becomes brittle and cracks after a season or two in direct sunlight. Look for leashes marketed as UV-resistant — Seattle Sports specifically calls this out, and it’s a meaningful difference. A $12 leash that lasts one season is worse value than a $15 leash that lasts five.
Snap hook corrosion is the failure point you’ll see most often in saltwater use. Zinc or uncoated steel snaps develop rust spots quickly in a marine environment. NRS uses stainless steel snaps — worth paying for if you paddle coastal salt water regularly. If you paddle freshwater only, standard snap hooks are fine.
Wrist strap durability comes down to whether you’re using velcro or buckle. Velcro wears out over time as debris gets embedded in the hook side. Buckle straps last longer but don’t release as naturally. For regular use, buckle is the more durable long-term choice.
Frequently Asked Questions
What is the best kayak paddle leash for 2026?
The best kayak paddle leash for most paddlers in 2026 is the Seattle Sports Coiler Paddle Leash. It extends to 9 feet, includes a quick-release wrist buckle, uses UV-resistant cord that holds up season after season, and costs under $15. With over 3,200 Amazon reviews and a 4.5 star rating, it’s the most validated choice in the category. For kayak fishing specifically, the YakAttack PadHook is the better pick because it attaches to the kayak instead of the wrist, keeping both hands free.
Do I really need a paddle leash for kayaking?
Yes — a paddle leash is one of the most practical safety accessories you can own for any price. If you capsize, catch a wave, or lunge for something and miss, your paddle can drift away faster than you can swim after it. In current, the paddle leaves faster than you’d believe. Without a leash, retrieving a floating paddle is difficult and potentially dangerous, especially solo. A good leash costs $10–$15 and weighs less than 3 oz — there’s no sensible argument against carrying one.
What is the best paddle leash for kayak fishing?
The best paddle leash for kayak fishing is the YakAttack PadHook. Unlike wrist leashes, it clips to your kayak deck rigging or PFD D-ring, leaving both hands completely free for casting, reeling, and handling fish. It extends to 8 feet, includes a quick-release clip, and is made in the USA. YakAttack is the brand that serious kayak anglers use, and the PadHook reflects the specific demands of fishing from a kayak rather than just paddling one.
What length paddle leash do I need?
For sit-on-top kayaks, use a 7–9 foot leash — the wider hull and higher seating position means the paddle shaft travels farther during each stroke, and you want the leash to have enough slack that it doesn’t pull at your wrist on every stroke. For sit-inside kayaks with narrower hulls, 6–7 feet is sufficient. For river paddling or narrow channels, shorter is safer to avoid the leash snagging on obstacles. The 9-foot Seattle Sports leash is the right length for most recreational sit-on-top paddlers.
Are coiled paddle leashes better than straight ones?
Coiled leashes are better for most kayakers because they contract when not under tension — staying out of the way between strokes and eliminating the trailing cord problem that plagues straight leashes in a cockpit. Straight leashes with quick-release buckles are preferred for whitewater and moving water because quick-release buckles are easier to build into flat webbing and critical for safety in fast current. If you paddle calm water, coiled is the right choice. If you paddle rivers or tidal races, straight with quick-release is worth the different feel.
Should I attach a paddle leash to my wrist or my kayak?
Wrist attachment is safer for open water, ocean, and coastal paddling because the paddle stays with you even if you capsize and drift away from the kayak. Kayak attachment is better for kayak fishing because it keeps your hands completely free — the tradeoff is that the paddle stays with the boat, not with you, in a capsize. For whitewater above Class II, many experienced paddlers deliberately skip the leash entirely because entanglement in fast water is more dangerous than a drifting paddle. Know your environment before you decide.
How do I attach a paddle leash correctly?
Clip the snap hook end to the paddle shaft — ideally within 8 inches of the paddle blade, away from where your hands grip during normal paddling. Attach the wrist strap snugly but not so tight it restricts circulation. The leash should be on the same side as your dominant hand. Test the quick-release (if applicable) before your first paddle to confirm it releases cleanly. If you’re using a kayak-attached leash, clip it to a fixed point on the hull, not to a moveable rigging line that could shift during paddling.
Final Thoughts
A paddle leash is a $10–$30 piece of gear that you’ll barely think about when everything goes right — and be very glad you have when it doesn’t. For most recreational paddlers, the Seattle Sports Coiler Paddle Leash covers everything you need: 9-foot reach, quick-release buckle, UV-resistant cord, and enough Amazon reviews to know it actually holds up. If you fish from your kayak, get the YakAttack PadHook instead and keep both hands free where they belong. If you paddle moving water, spend the extra money on the NRS Quick-Release and get the genuine quick-release buckle — the day you need it, you’ll consider it the best purchase you ever made.
Keep your paddle close and your leash simple. Check out our guide to the best kayak paddles if you’re also in the market for a new blade to go with that leash.
If you have questions about any of the leashes above, drop a comment below — we read every one.